Your Cart is Empty
Free shipping on orders over $35 - continental US

Fairy gardens may seem like a new and trendy gardening hobby but they've actually been around for over 100 years in the United States.
They were first inspired by the Japanese Pavilion at the Chicago World's Fair in 1893. And ever since, miniature woodland habitats have been populating our gardens.
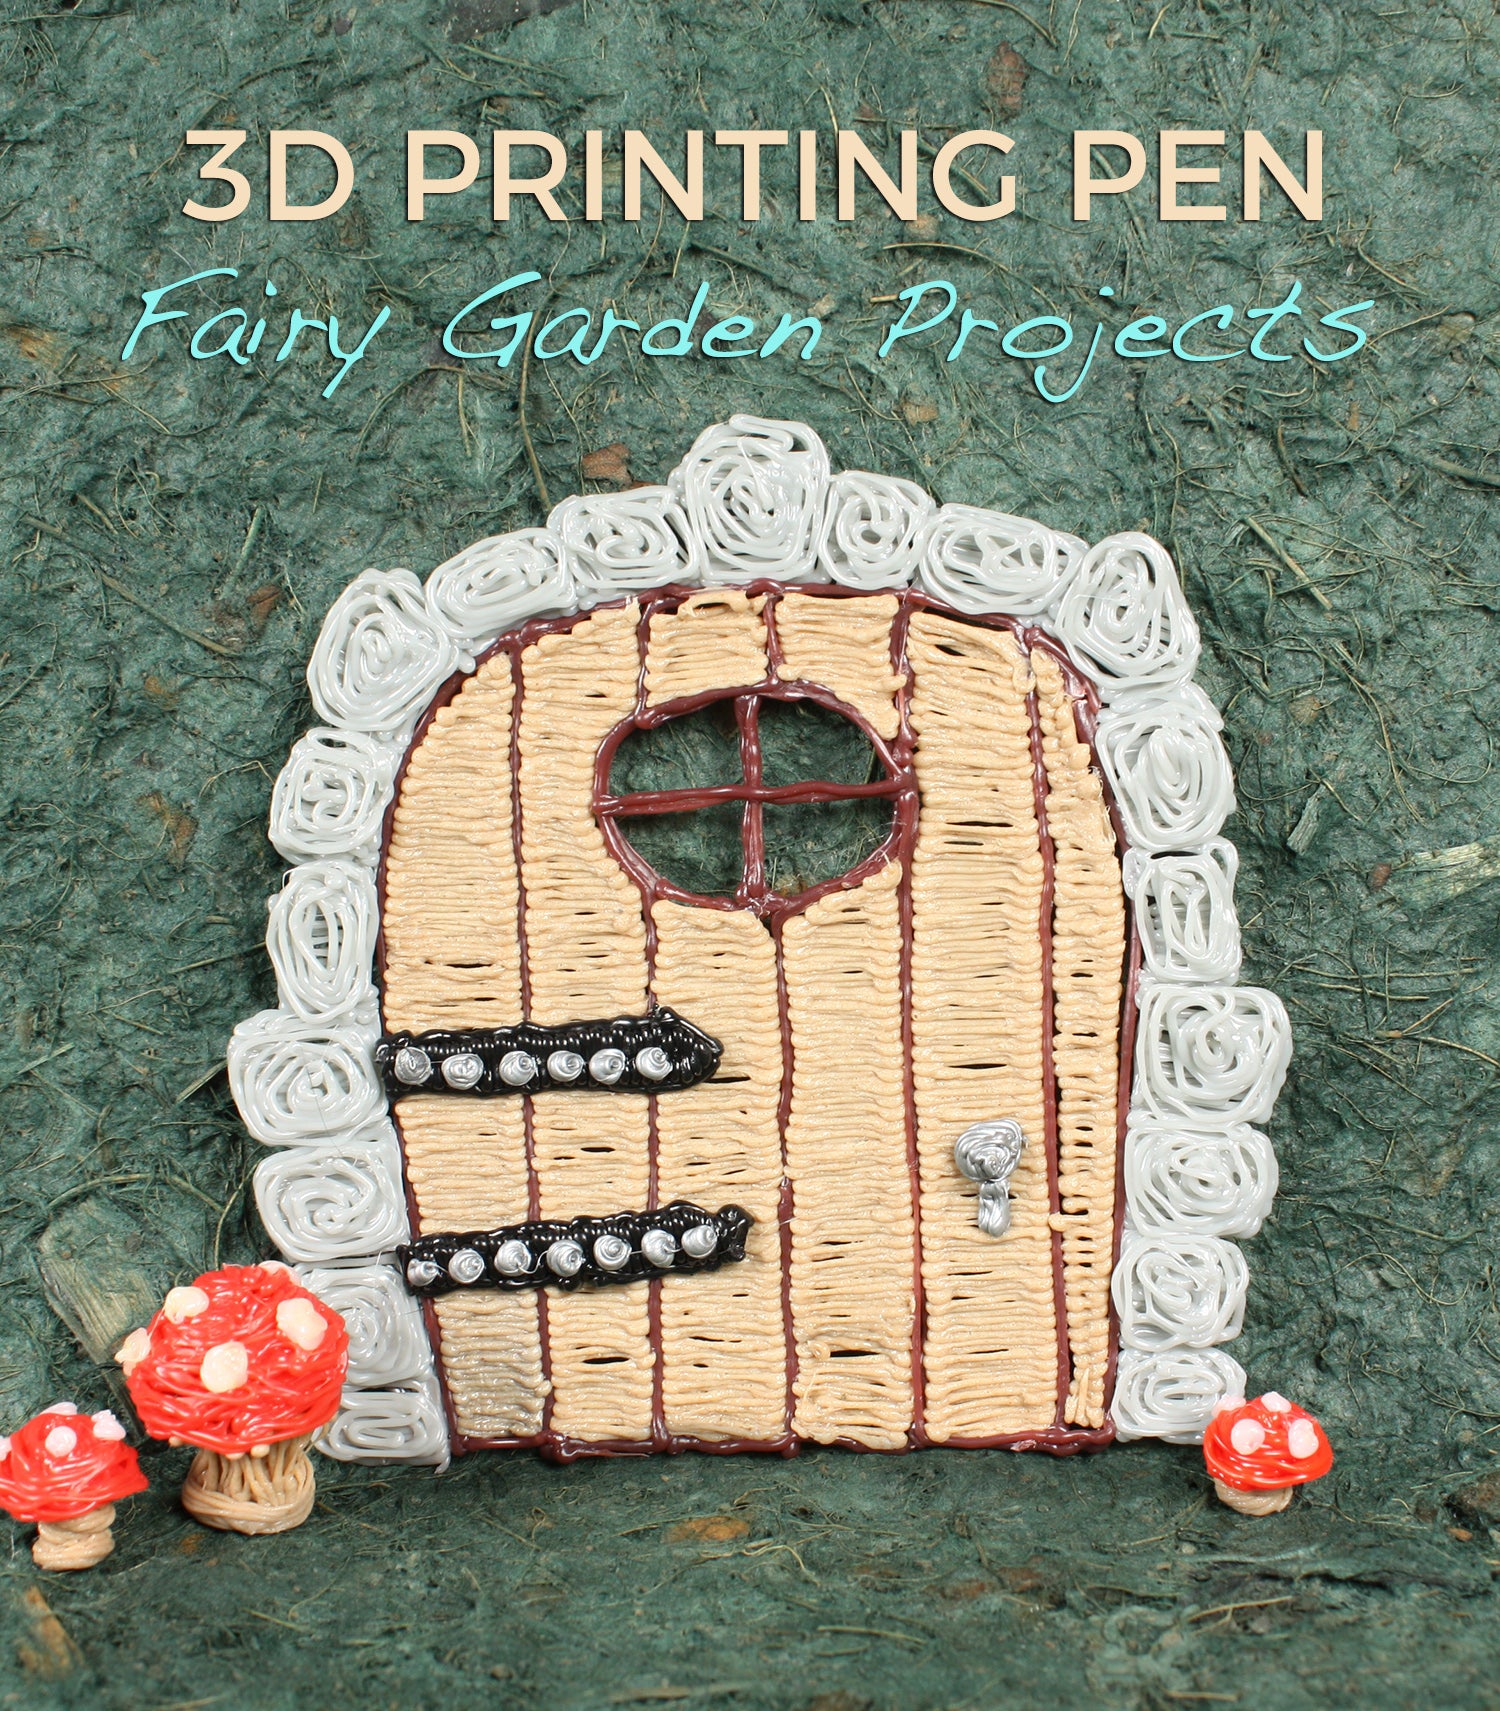
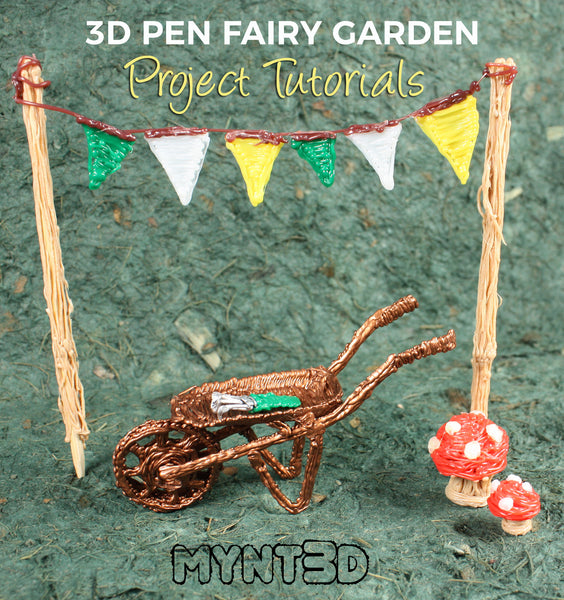
The tradition has been passed from generation to generation, and now we're putting a modern spin on this magical pastime. We've created seven fairy garden projects to make with your MYNT3D pen!
Supplies:
• MYNT3D pen
• Filament colors: black, white, red, PLA aluminum, PLA copper, PLA wood, grey, brown, green
• Recommended: Poly carbonate sheet
• Bamboo skewers and toothpicks
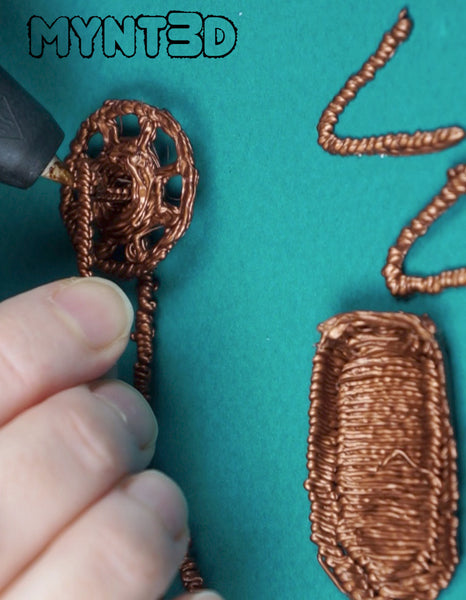
1. Load PLA copper filament into your pen. This metal infused filament gives a rustic look with a bit of shine.
2. Start by tracing the wheelbarrow parts on the project template. Draw 2 each of the wheel, leg and handle.
3. To make the hopper, cut out the template, fold up the sides and back to make a 3D form. Cover the form in plastic tape.
4. Attach the two wheels together. The added thickness will help with stability.
5. Draw a short wheel axel to fit through the center of the tire and connect the ends of the handle pieces. Be sure the handles angle out to less than the width of the wheelbarrow hopper.
6. Attach the legs to the sides of the handle pieces, at about the middle of the handle length.
7. Draw the hopper onto the handle pieces. Angle it upwards so that it rests above the wheel. Draw on side supports to hold it in place.
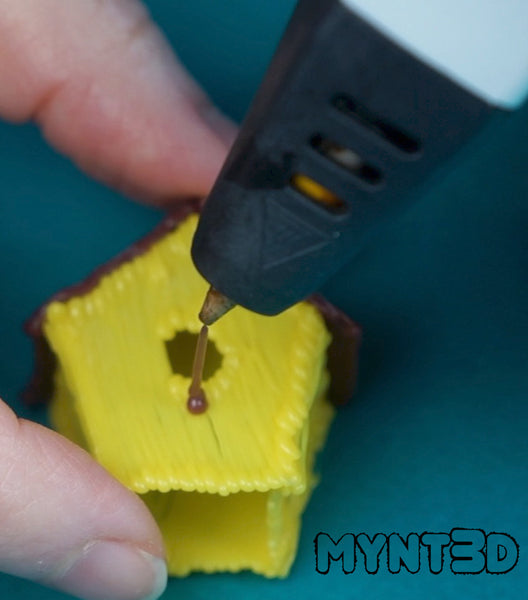
1. Heat your 3D pen to temperature and load a bright colored filament into your pen.
2. Start by tracing the front, back and sides on the project template.
3. Attach the four sides together.
4. Load brown filament in your 3D printing pen to draw the roof and attach.
5. Below the hole in the front of the birdhouse, draw a line of filament up and hold, to make a perch for a bird.
6. Start filing in the bottom of the birdhouse, leaving an opening for a skewer or chopstick.
7. Insert the skewer into the birdhouse and draw around it until it's secure and the house doesn't wiggle on the pole.
1. Start by outlining the door, window hole and vertical lines with brown filament.
2. Fill in each door board with PLA wood filament.
3. Switch to grey filament to trace and fill in the stones around the door.
4. Draw the door hinges in black and attach to the door.
5. Load PLA aluminum filament to add metal accents to the door hinges and to draw on the door knob.
TIP: If the door is going to be positioned around a curved tree trunk or flower pot, place the template onto a curved form such as an oatmeal container (cylinder). Then cover the template with plastic tape before drawing your door.
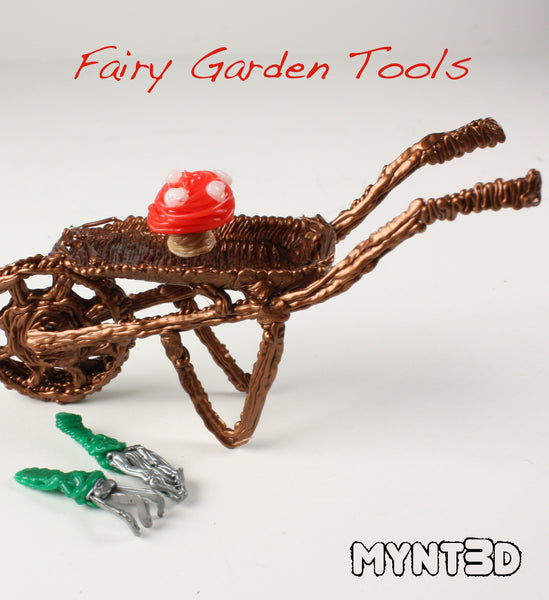
1. Start by tracing the spade and hoe prongs of the project template with PLA aluminum filament.
2. Line up the three prongs, tapering together at the flat end. Connect with the 3D pen.
3. Draw on handles, overlapping the tool portion so they stay together.
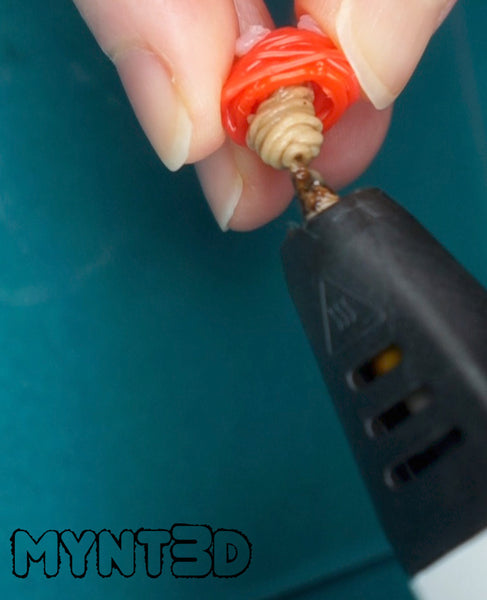
1. Depending on the size of your toadstool/mushroom, you can make the top by either coiling your filament into a half sphere, or winding it around half of a small sphere form, like a marble.
2.Draw on polka dots with white filament.
3. Switch to PLA wood filament to draw the bottom portion. Start by coiling the filament inside the upper part until it extends out the bottom. For large toadstools, draw a web over the underside of the top piece, then coil on the mushroom stem part.
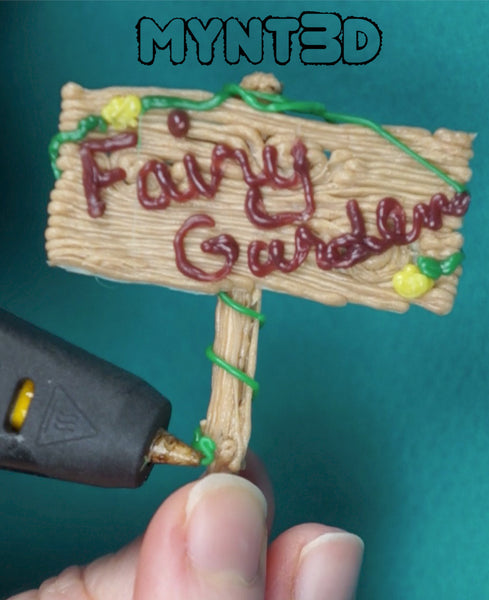
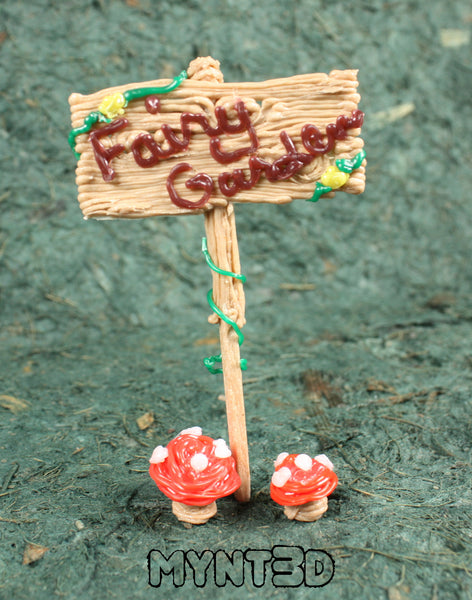
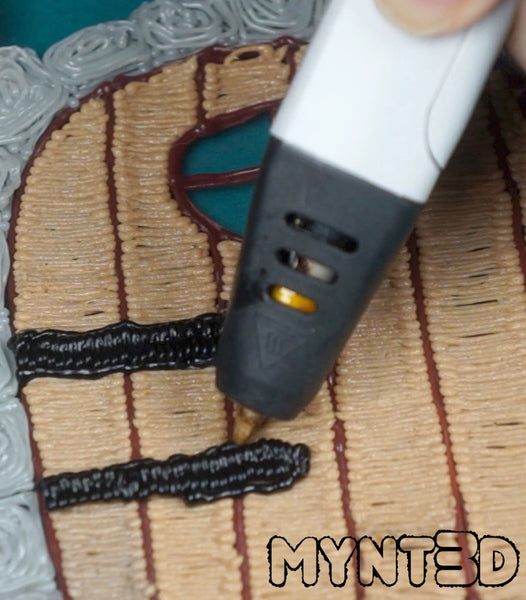
1. Start by tracing the sign project template with PLA wood filament. Note: to get a knotted wood texture, draw spirals in your design.
2. Draw the wood filament over a toothpick.
3. Attach the sign to the toothpick post using the 3D printing pen.
4. Slow down the speed on your 3D printing pen to draw on the letters of your sign.
5. Embellish the sign with miniature flower blooms and vines.
1. While making the above projects, take a moment to make a triangle pennant or miniature article of clothing when you have different filament colors loaded in your 3D pen.
2. Draw the wood filament over two skewers. You may want to cut skewers to a shorter height.
3. Load brown filament in your 3D pen. Wind around the top of one skewer post. Then continue drawing across a 5" - 6" distance for the clothes line. End by wrapping filament around the top of the other post.
4. Attach the clothes or pennants to the clothesline with the 3D pen.
Fairy Garden 3D Pen DIY Projects from MYNT3D on Vimeo.
Comments will be approved before showing up.
