Your Cart is Empty
Free shipping on orders over $35 - continental US

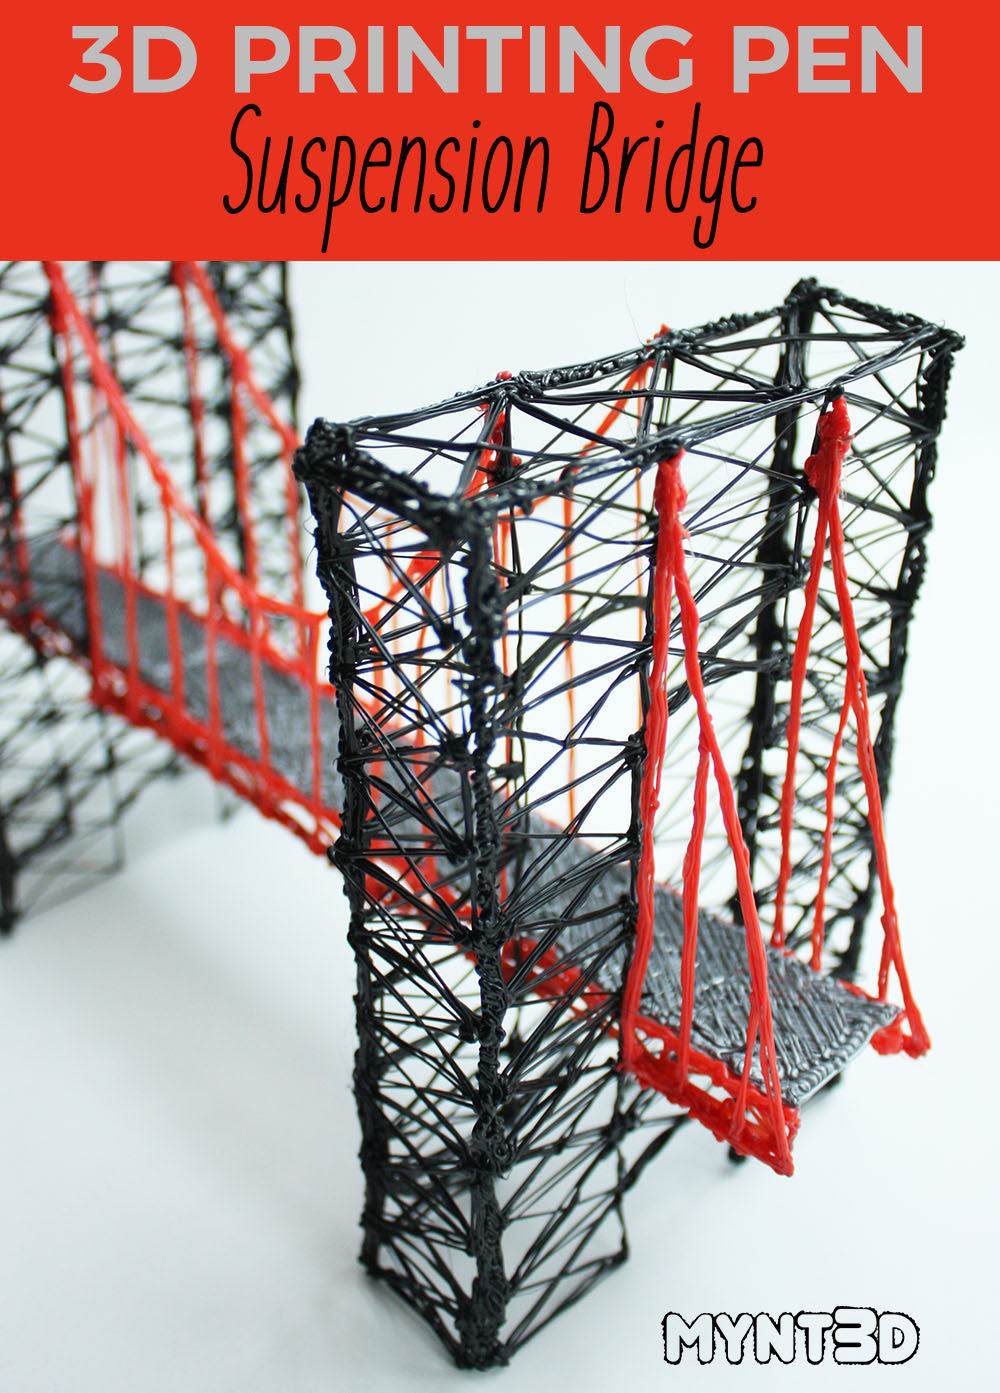
A suspension bridge 3d pen project brings fun and learning together - from future city planning to engineering structures to good old fashioned play time.
You'll learn when creating this project how the criss crossing of the filament may allow for flexibility in the structure - something that architects explore for earthquake-proof buildings. And then see how joining pieces adds stability for bearing weight.
So put your thinking cap on and get ready to experience something interesting and very hands-on!

Supplies
MYNT3D professional printing pen
1.75mm filament in colors of your choice
Box or square structure to assist with forming corners
(Optional) Measuring grid for positioning structural pieces

1. Start by downloading the Suspension Bridge Project Template. Use your printer settings to scale template if desired.
2. Start heating your 3D pen. When it reaches the proper temperature, load the filament.
3. Start with the pillars. Trace over the lines but do not fill in the center. Repeat until you have 4 fronts and sides, and 2 tops.
4. Attach sides, then top. It’s helpful to use a box or Lego bricks to rest the pieces against the edge to assist with forming the right angle of the structure.

5. Next, trace the road and side rail pieces. The side rails attach to the bottom outside edge of the road.
6. Feed the road through the 2 pillars, spacing them so there is 5” between pillars. We recommend using a measuring device or grid to position the units evenly and at proper angles.
7. Attach the suspension pieces to the road and the bridge pillars. NOTE: Your pillar size can vary from added filament in the construction process. This may require some improvising when assembling.
Comments will be approved before showing up.
