Your Cart is Empty
Free shipping on orders over $35 - continental US
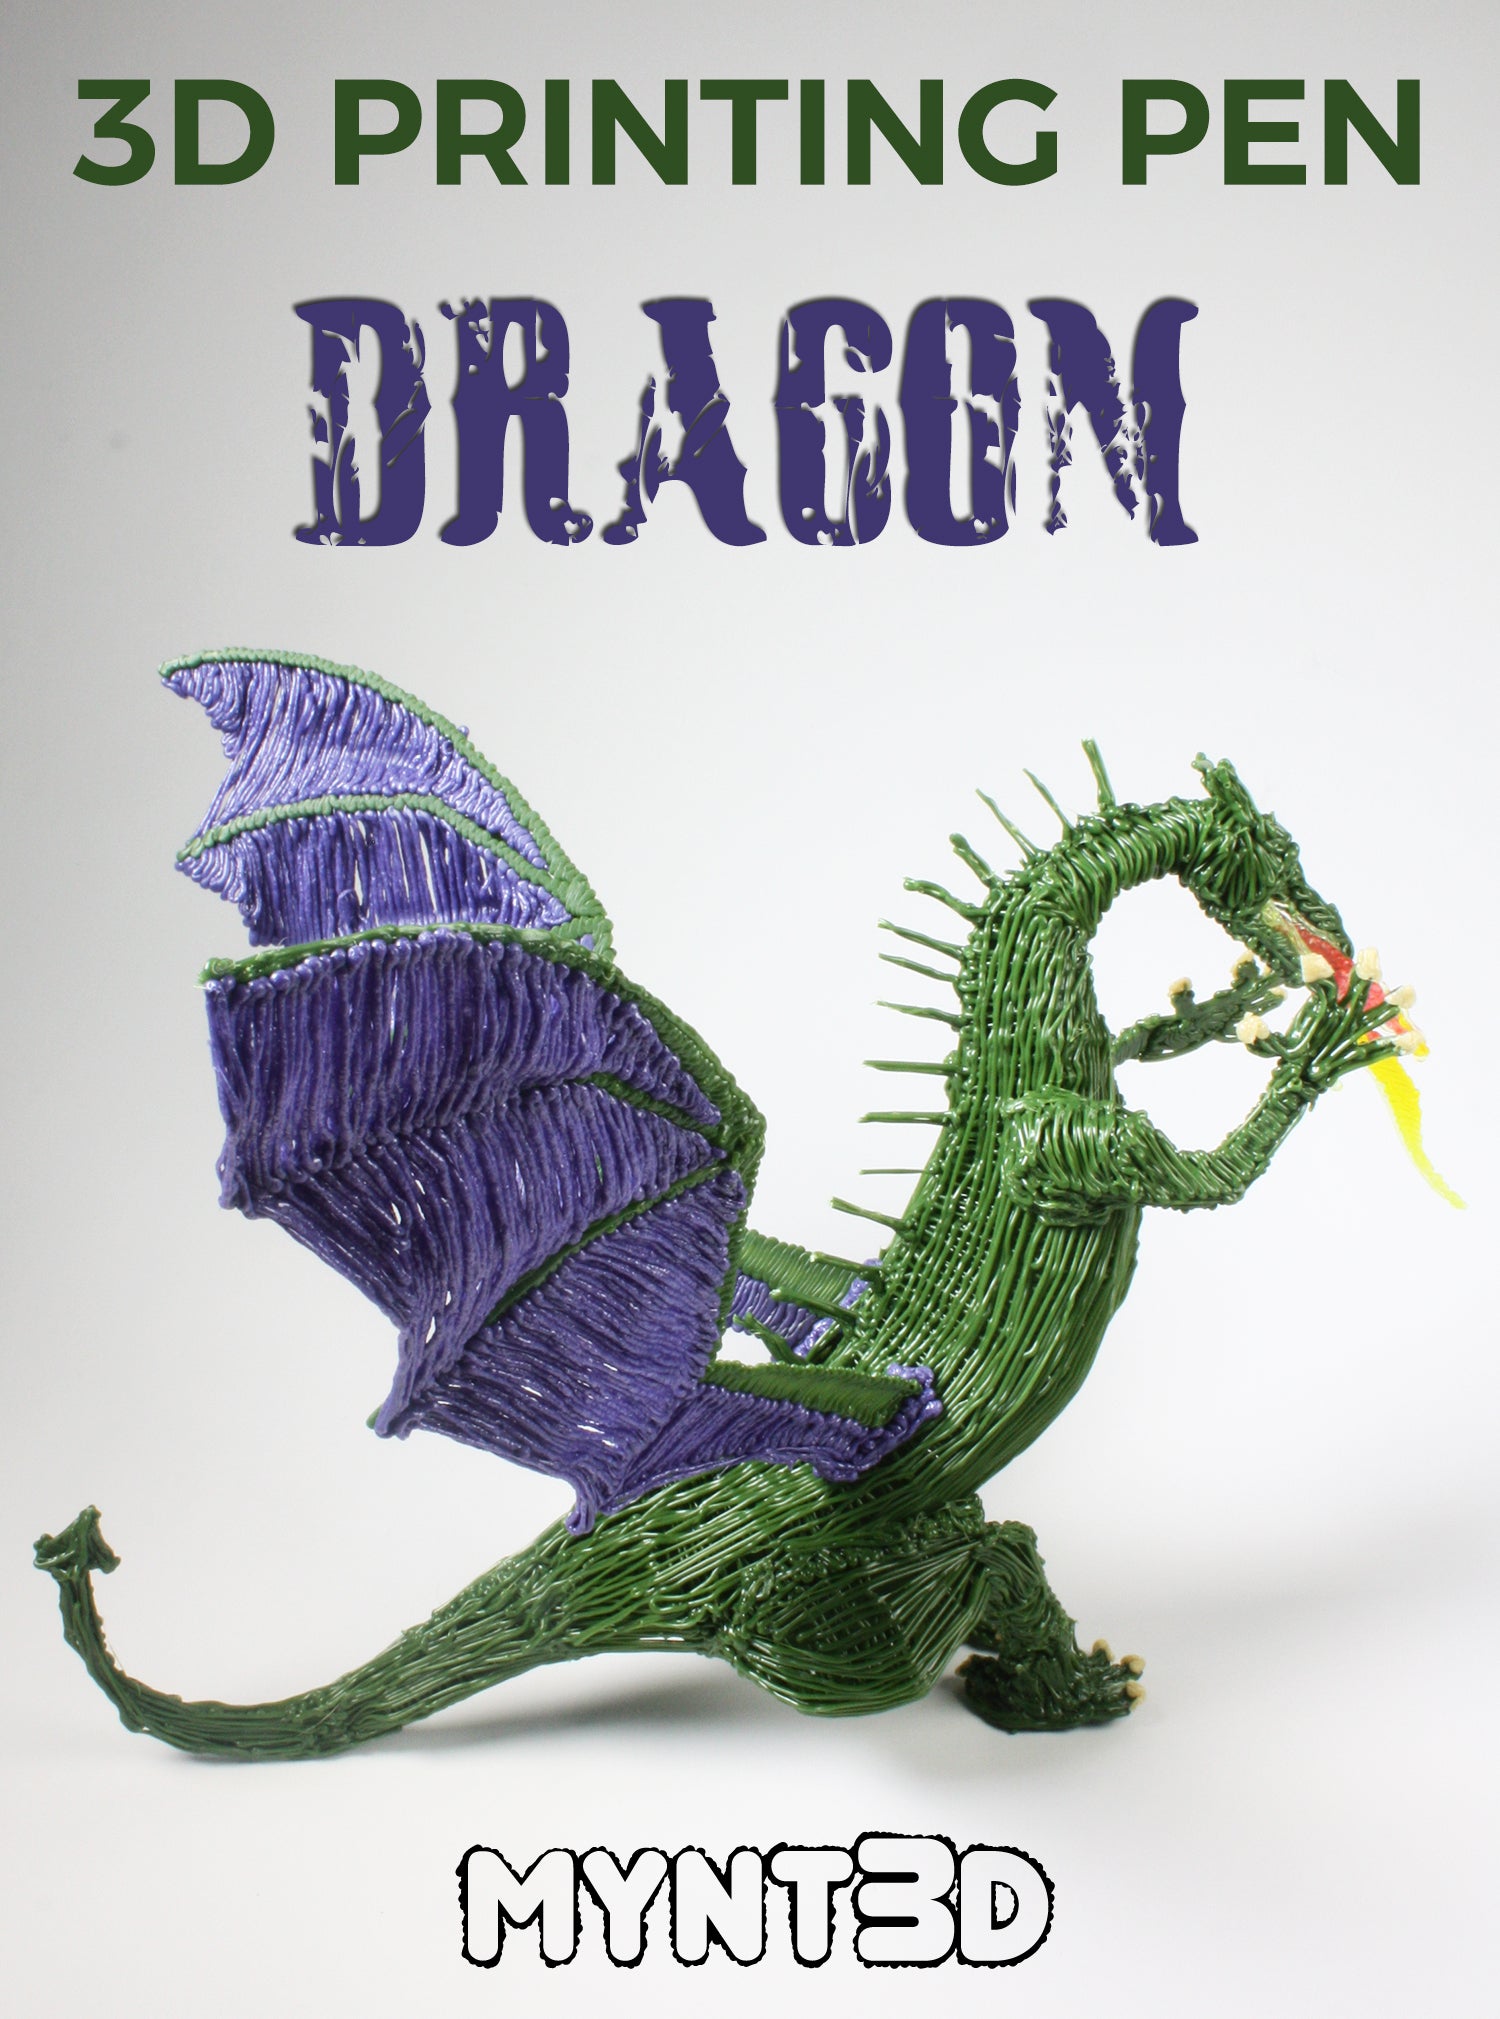

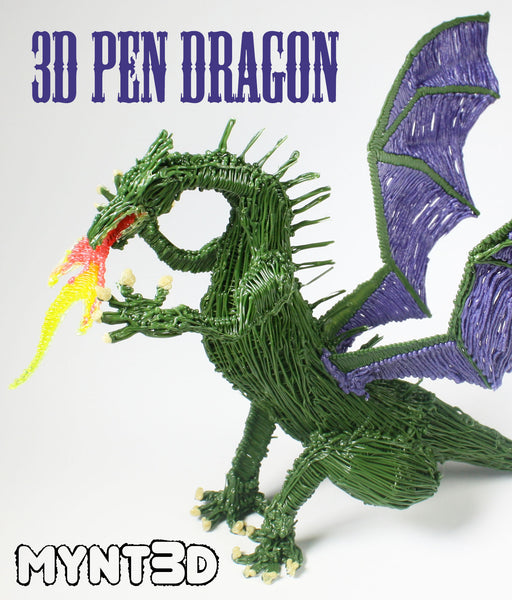
Let’s face it, we like fire-breathing dragons as much as the next guy. So why not make a really amazing one with your MYNT3D pen!
In this project tutorial, we'll show you how to take a 2D stencil template and easily transform it into 3D. Our free project template, which makes this intermediate project feel like you’re showing off.
And let's face it, we like showing off. Wink, wink.
Supplies:
• Filament colors from the Super 32 pack of ABS
• PETG Translucent Filament
• Dragon free project template
• Thick Marker
• Pencil
• Toothpick
• Scissors
1. Download and print the dragon free project template from MYNT3D.
2. Pick out your filament and heat up your MYNT3D pen. ABS = 210°C / PLA 170° - 175°C.
3. Trace and fill in the dragon body.
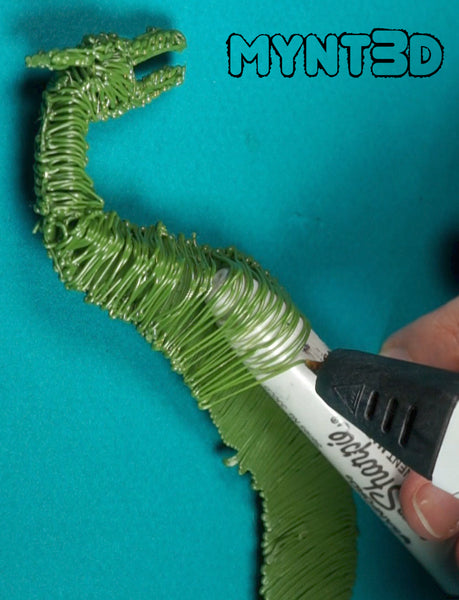
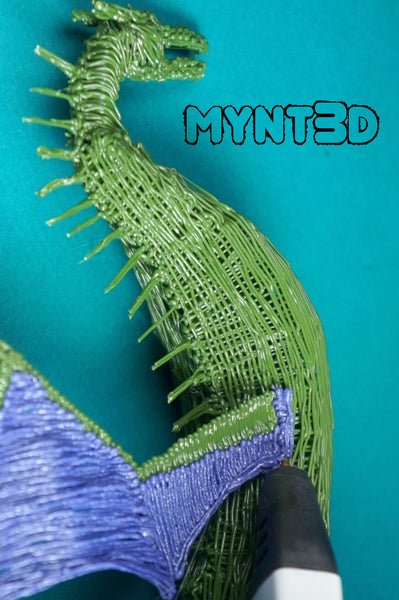
4. Add filament to the sides to add dimension. Start with the head, coiling your filament.
5. Draw over a toothpick to add depth to the neck.
6. Increase the depth as you work your way down the body by drawing over a pencil and then a thick marker at the widest part of the body.
7. As you get closer to the tail, decrease the depth by drawing over a pencil, then a toothpick.
8. Trace only one flat layer of filament on each side of the tail.
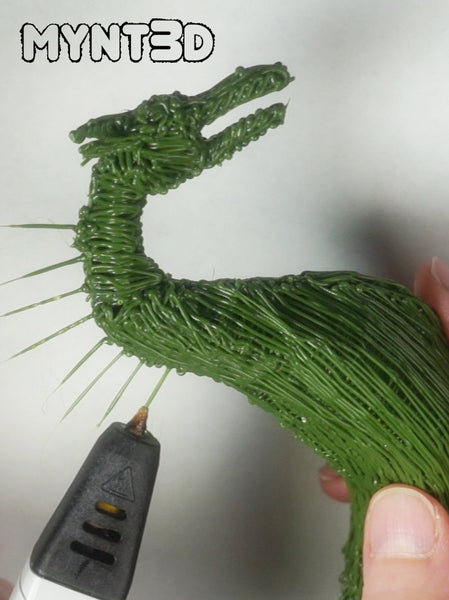
9. Draw spikes along the spine. TIP: let the first strand harden in place. Then draw a second strand.
10. Use scissors to clip the spikes to a uniform length.
11. To make the wings, start by tracing and filling in the “bones.”
12. Connect the skin part, from bone to bone, drawing over a pencil tip to add dimension.
13. Attach to the dragon body on either side of the spiked spine.
14. For the legs, trace the 2D template. Draw over a thick marker for a meaty thigh.
15. Then draw over a toothpick for the lower legs. Attach to the dragon body.
16. Trace and fill in the feet and claws directly on the paper template.
17. Attach feet to the legs. To improve balance, rest the dragon on its bottom and attach the legs and feet.
18. Draw the arm templates. Draw over a toothpick for bicep depth.
19. Attach arms to the body and connect claws.
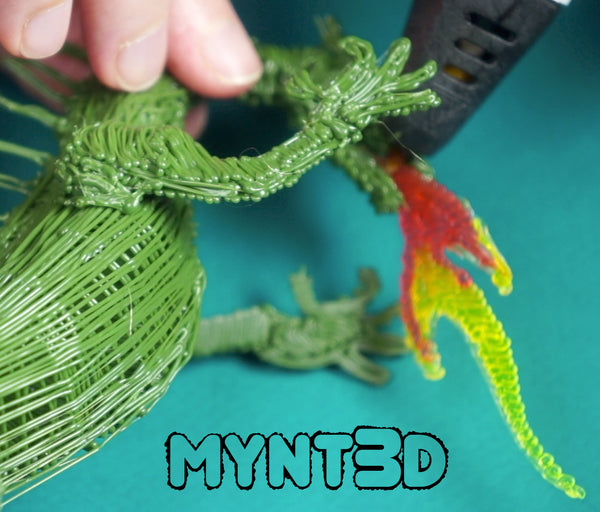
20. To create the flame, we suggest using translucent PETG filament.
21. Gradate the colors from red to yellow to clear at the tips of the flame.
22. Attach flames into the dragon’s mouth with the clear filament.
3D Pen Dragon Project from MYNT3D on Vimeo.
Comments will be approved before showing up.
