Your Cart is Empty
Free shipping on orders over $35 - continental US

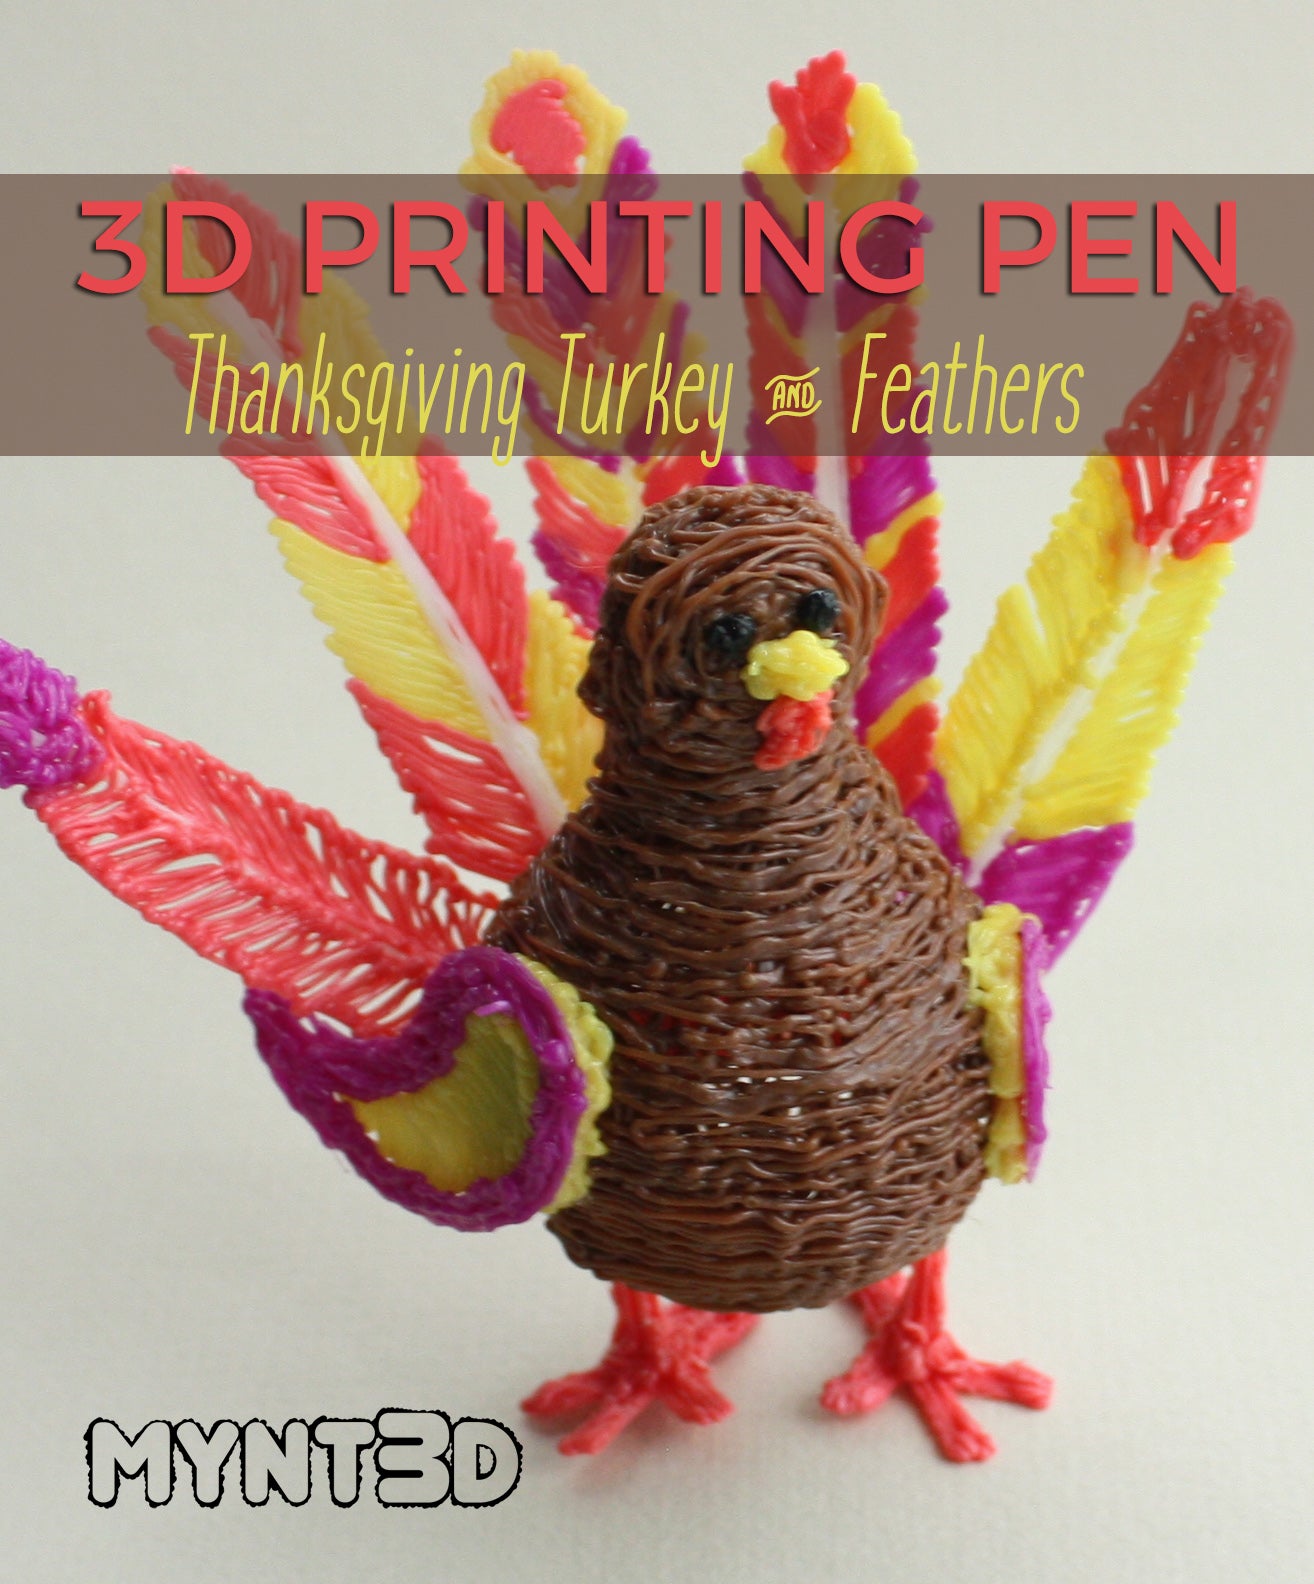
With all the hustle and bustle of the holiday season, let's not forget to give thanks for all we have. In the United States we do this with a traditional meal that brings families together from far and wide to enjoy good times and good food.
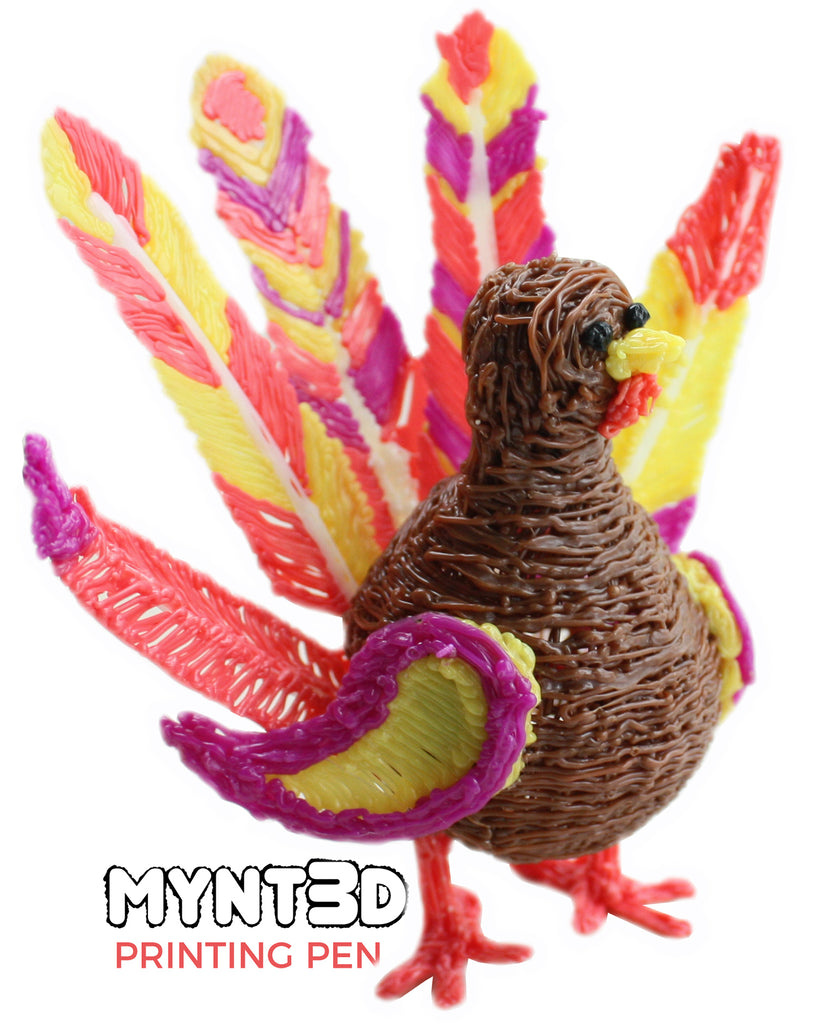
At MYNT3D, we want to enhance your holiday celebration with a craft project that can be adapted into napkin rings, place card holders or embellishments for a welcome sign or wreath.
1. Start by downloading the Turkey & Feathers Project Template. Use your printer settings to scale template if desired.
2. Start heating your 3D pen. When it reaches the proper temperature, load filament. Tip: Pick out an assortment of colorful filaments that will match your table settings and holiday linens.
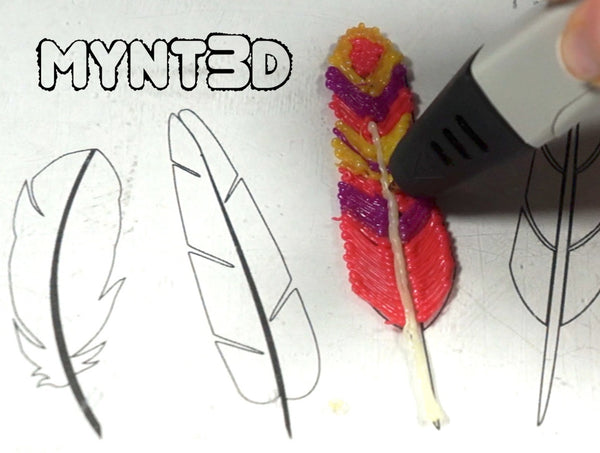
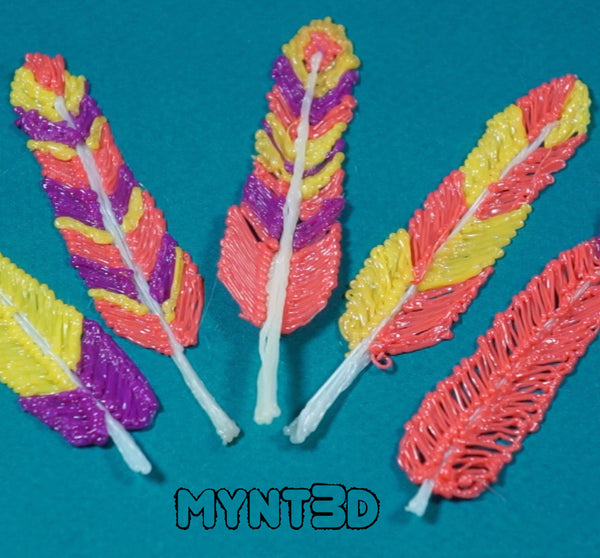
3. Begin with the colorful feathers. Draw parallel lines coming from the center going outward. Fill in different sections of the feathers at once so you don't need to keep switching filament colors back and forth.
4. Change filament colors to add alternating feather colors, colored feather tips and stripes to make your feathers even more decorative.
5. While you have the feather colors loaded, trace the wings and feet.
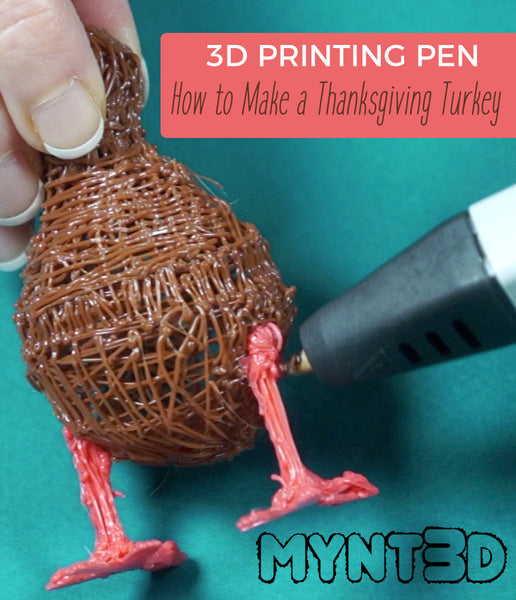
6. To make the feet, trace the template. Then trace just the long center line again - this will be the leg piece.
7. To make the body, load brown filament in the 3D pen. Find or form (with play dough wrapped in plastic tape) a round or oval form for the turkey body. We used a plastic toy egg.
8. Wind and wrap filament around one half of the form. Repeat with the other half and connect.
9. Use the project template to draw the turkey head. Start by coiling around the outline of the head, layering filament as you narrow the coil to a rounded finish. Repeat for the back of the head and connect.
10. Hold the head in place over the body. There should be about a 1/2" between the head and body. Draw a few strands and let harden. Then continue filling in the neck.
11. Connect the legs and feet of the turkey. Attach to the body. TIP: position the legs at the back of the body because when the feathers are added it will be back-heavy and need the extra support.
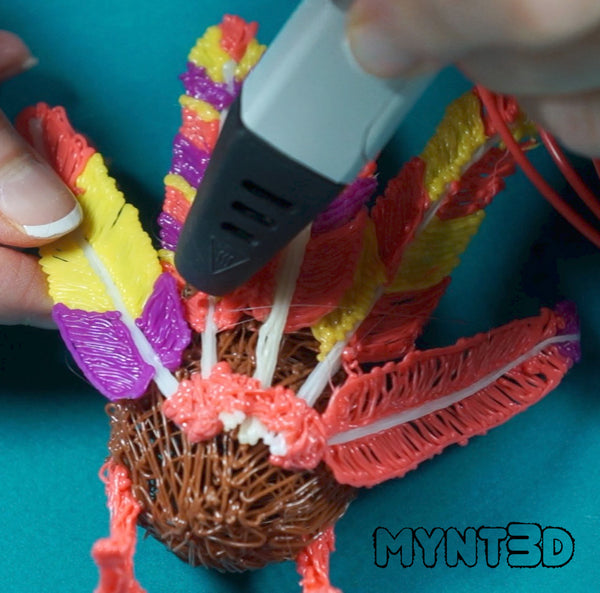
12. Arrange the feathers, and attach to the back of the body in a fanned-out fashion.
13. Add on the wings to the sides of the body.
14. Draw on the eyes, beak and gizzard.
Gobble, gobble!
Comments will be approved before showing up.
