Your Cart is Empty
Free shipping on orders over $50 - continental US

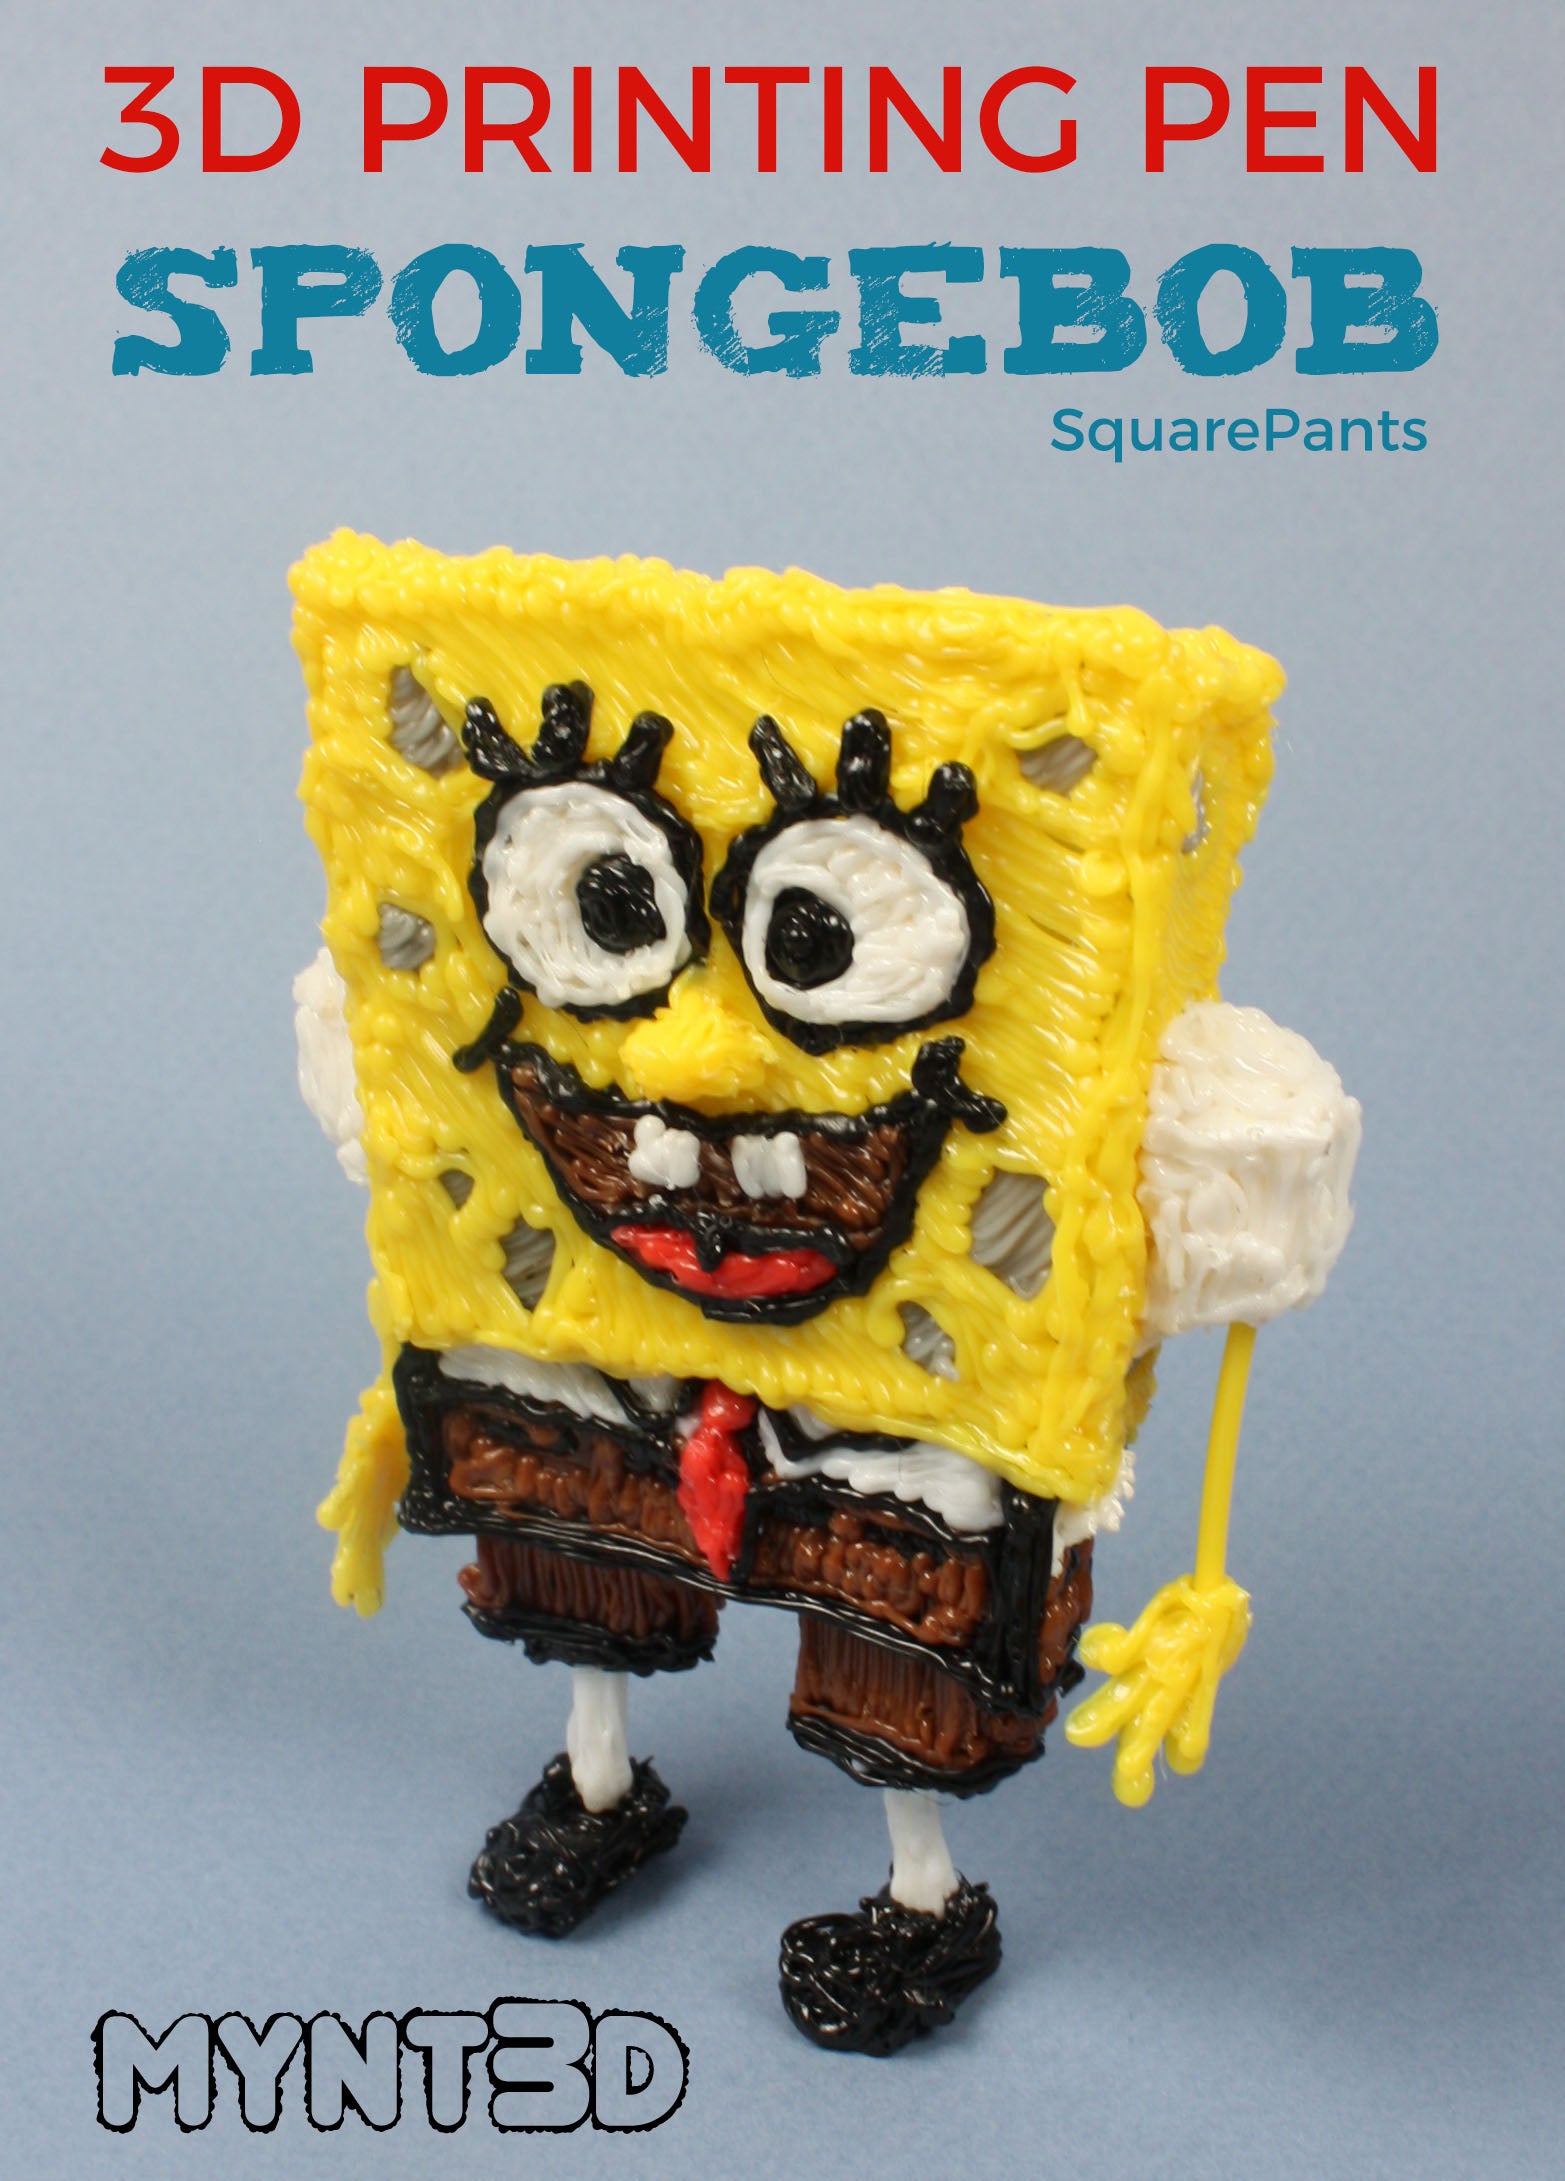
SpongeBob SquarePants is one of those animated series that you liked as a kid and is still funny today! Everyone loves that super happy sea sponge who looks like a kitchen sponge, and lives in a pineapple under the sea.
This isn't actually a recipe for Krabby Patties, because there is, in fact, no official Krabby Patty recipe (Barnacles!). But this SpongeBob project will surely bring back those funny memories of Bikini Bottom's most famous resident!
Supplies:
• Filament colors from the Super 32 pack of ABS: red, white, yellow, gray, wood brown, black
• SpongeBob SquarePants free project template
• Needle-nose pliers
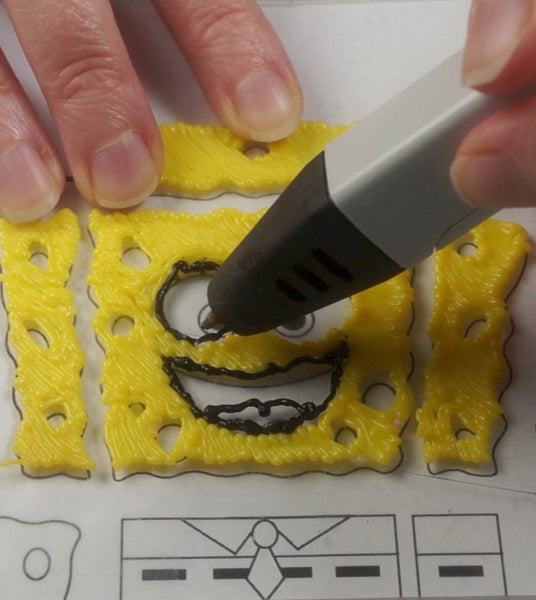
1. Start by filling in the yellow sponge area of the project template, leaving the holes open.
2. Use black filament to outline the facial features and his square pants and shirt.
3. Connect the clothing sides together to form a rectangle. TIP: Use the edge of a box to form right angles at the corner.
4. Flip the sponge pieces over to the back and fill in the holes with gray filament.
5. Then connect the sponge pieces above the clothing, slightly overlapping. Fill in the gaps along the edges of the sponge.
6. Trace the hands from the project template and set aside.
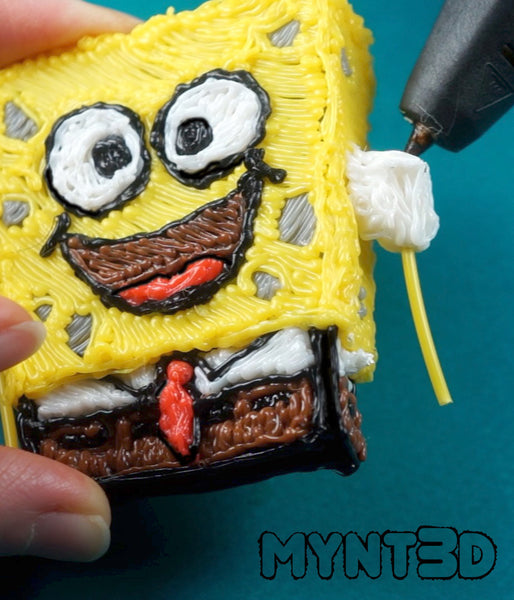
7. Coil white filament in a small circle for the shirt sleeves.
8. Insert a raw segment of yellow filament into the coil for the arms. Secure with white filament and connect to the sides of the sponge.
9. Attach the hands to the arms. TIP: Hold the hands with needle-nose pliers when attaching so that you don't accidentally burn yourself with the tip of the 3D pen.
10. Roll a small piece of paper and insert into the pants to create a template for the pant legs.
11. Draw with brown filament, remove the paper form and attach to the body.
12. Draw the stick-like legs and attach into the pant legs.
13. Draw and attach the black shoes, adding filament to dimension and stability.
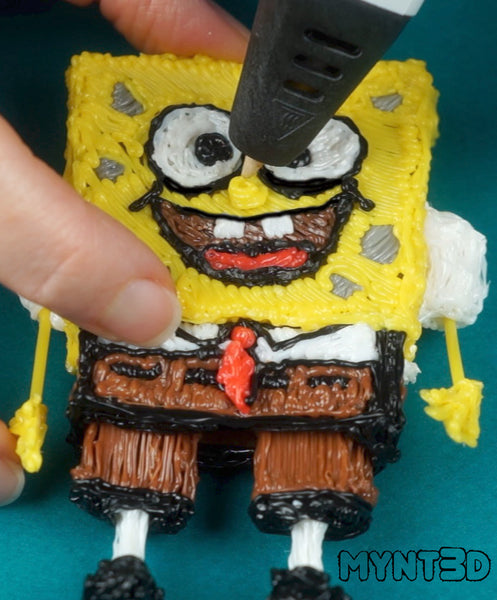
14. Finish off by adding the nose and remaining facial details like eyelashes and teeth.
SpongeBob 3D Pen Tutorial from MYNT3D on Vimeo.
Comments will be approved before showing up.

Tanishka
December 16, 2019
It looks very beautiful