Your Cart is Empty
Free shipping on orders over $35 - continental US
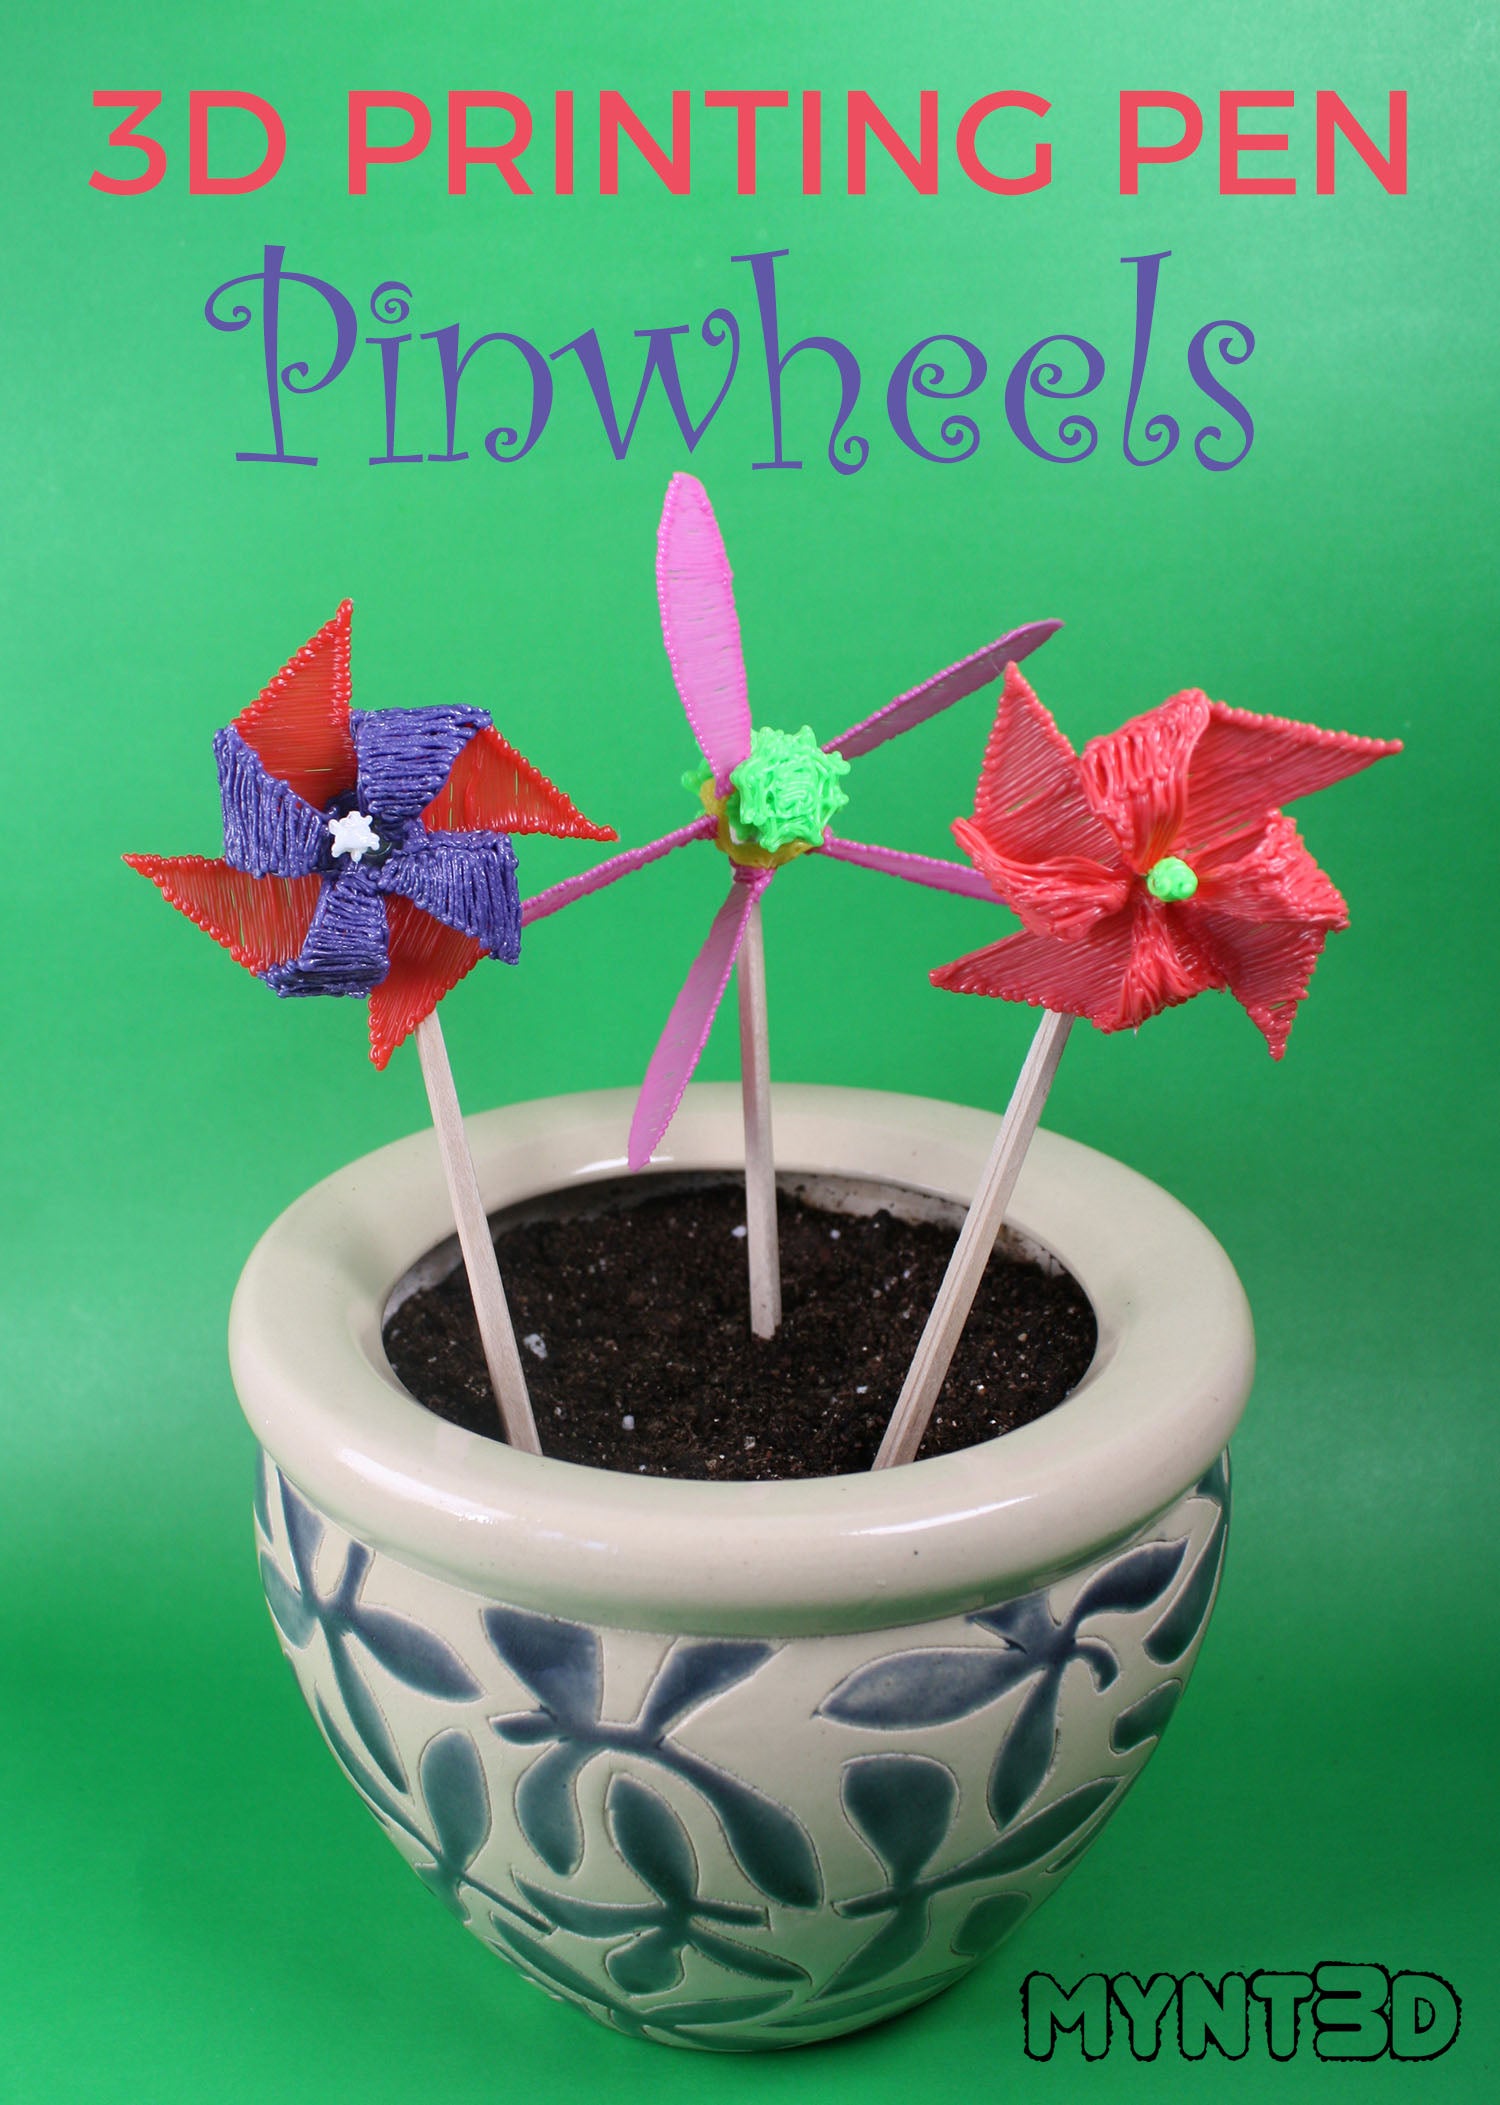

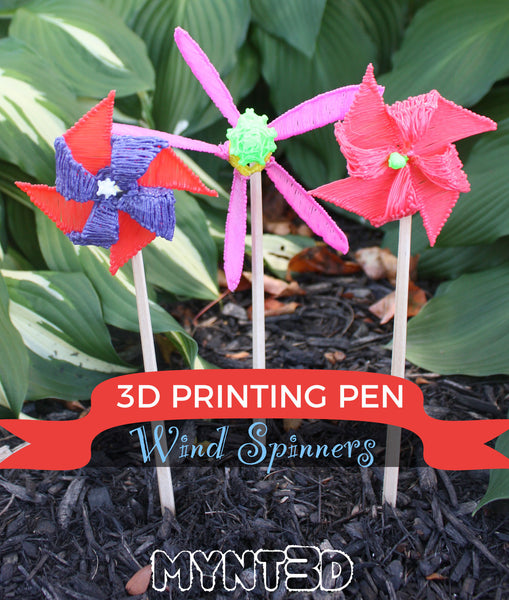
This week we have a breezy summer project for you: Pinwheel spinners! Not only are they fun to see in motion, they can be made into many motifs - from patriotic to summer themes like flowers and flip flops.
So download the free project template, and put your spin on a custom pinwheel design.
Supplies:
• Filament colors from the Super 32 pack of ABS
• Wind spinners free project template
• Chopsticks or small dowels
• Sticky tack
• Small metal washer
• Pencil
• Scissors
• Tape
1. Heat up your MYNT3D pen to 210C and pick out your favorite ABS colors.
2. For the windmill version, cut the center ring template, glue to cardstock, roll and tape.
3. Go back and forth with filament around the ring. Then remove the paper.
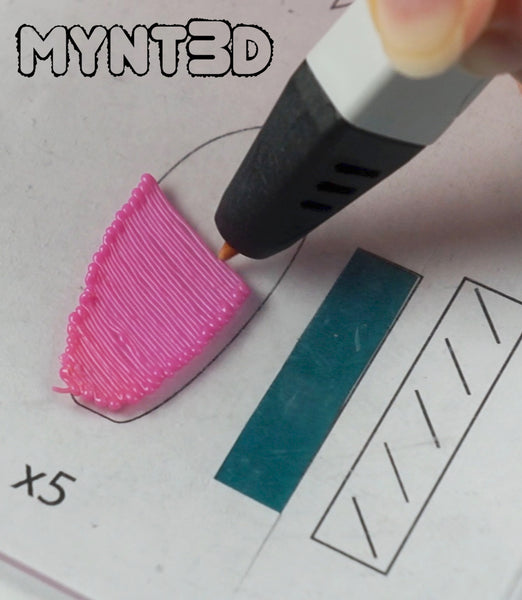
4. Trace and fill in the 5 flower petals.
5. Use the spacing template to mark the petal placements on the ring.
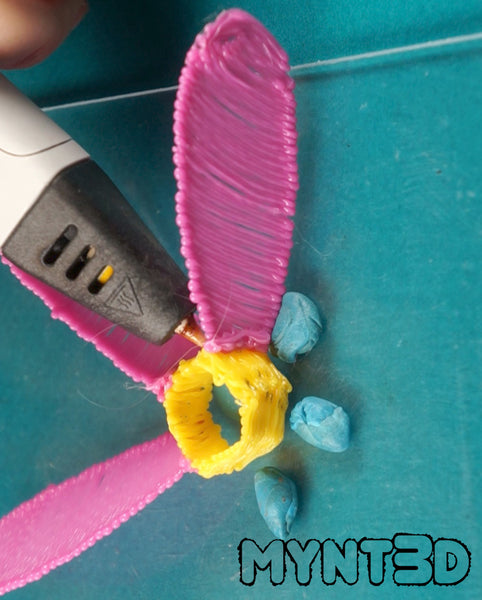
6. Attach the petals. Note: Use sticky tack to assist when connecting.
7. Upcycle a chopstick or dowel for the stick, covering the top inch with filament.
8. Draw an axle for the spinner and attach perpendicular to the top part of the stick.
9. Draw two center flowers to go on either side of the spinner. Attach to the axle.
Now, give it a spin!
1. Prepare the spinner stick the same way as Steps 7 and 8 for the windmill version.
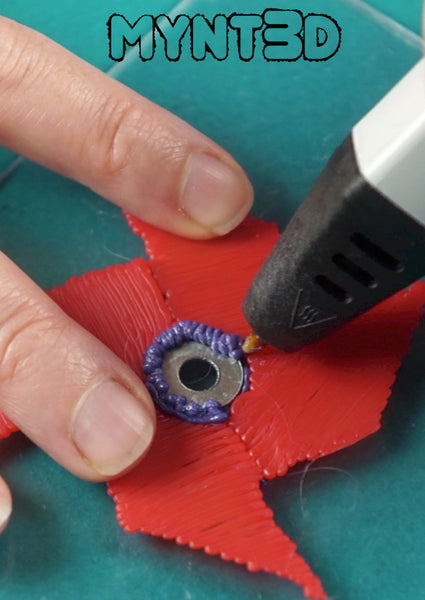
2. For the more traditional pinwheel, place a small metal washer in the center of the template.
3. Tracing and fill-in the pinwheel template. Note: Be sure to go over and under the washer edge with filament to secure it on the front and back sides.

4. Place a pencil inside the vertical outside edge of a pinwheel blade and use your 3D pen to draw from the outer edge to the inner center point. It should make an arching triangle shape.
5. Wiggle out the pencil when the filament cools. Repeat with the other 3 blades.
6. Place the spinner in the axle and add filament to the axle tip.
3D Pen Pinwheel Wind Spinners from MYNT3D on Vimeo.
Comments will be approved before showing up.
