Your Cart is Empty
Free shipping on orders over $50 - continental US

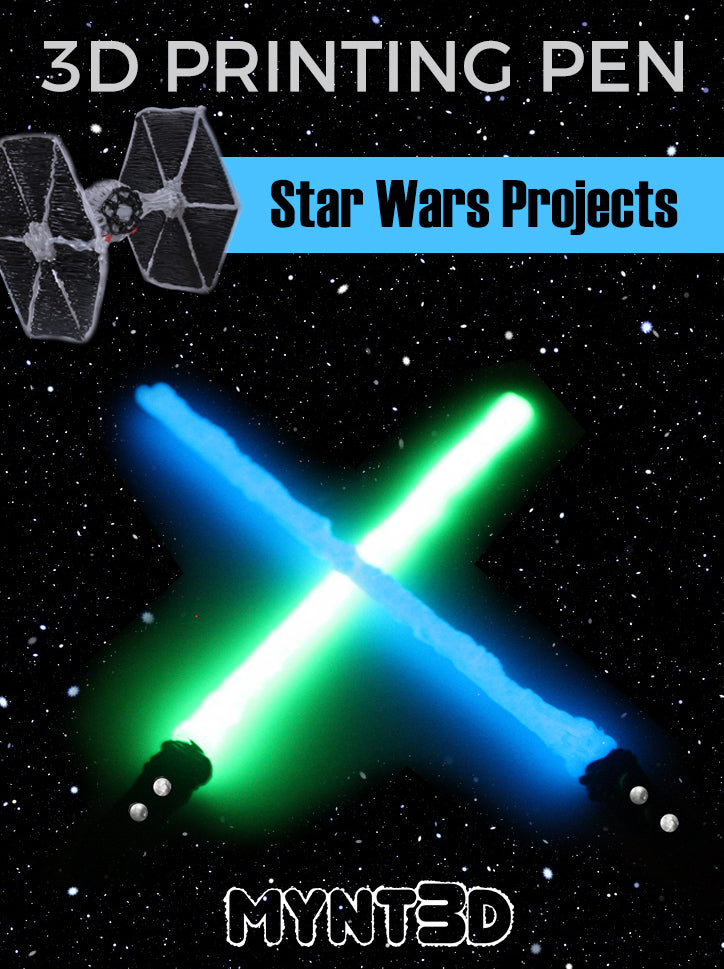
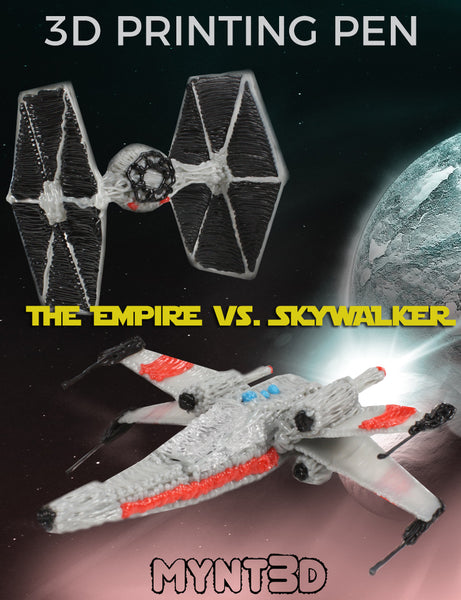
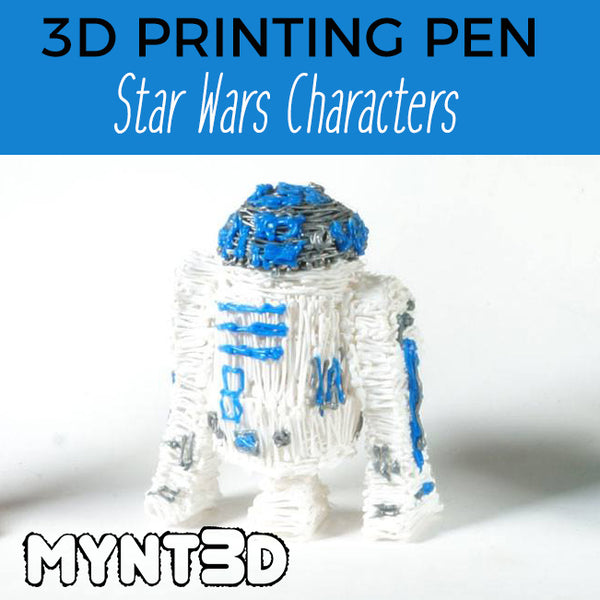
Celebrate Star Wars Day on May the 4th by making lightsabers, battle planes and your favorite characters from a galaxy far, far away. Star Wars has been around for decades, delighting us with planets, machines and battle gear like no other. Now we challenge you to use your MYNT3D pen to bring to life these iconic fighter jets and sabers.
May the force be with you as you embark on these Jedi inspired 3D pen projects!
Supplies:
• Filament colors from the Super 32 pack of ABS: black, grey, sky blue, fluorescent red, luminous green (glow in the dark), luminous blue
• Recommended: Poly carbonate sheet
• Bamboo skewer or toothpick
• Marble
• Sticky tack
1. Trace over the lightsaber handle with black filament. Go back and forth to create depth. Flip over and add depth to the other side.
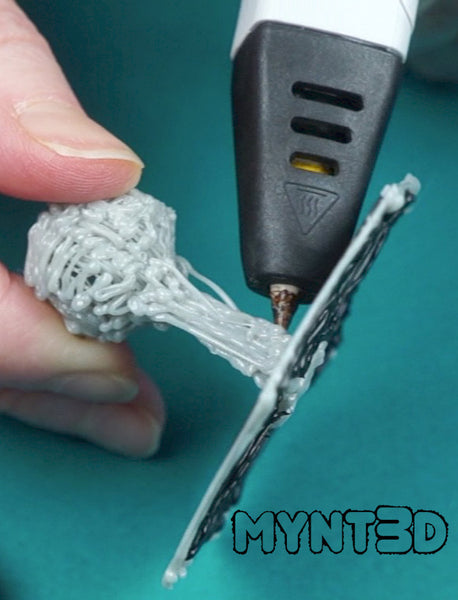
2. Coil black filament around one end of the handle. This will make it easier to attach the blade.
3. Dab on shiny buttons onto the handle.
4. Zig zag glow in the dark or red filament for the lightsaber "blade."
5. Use sticky tack to stand the handle upright while you attach the blade. Stick the blade in the handle coil and draw on filament to attach.
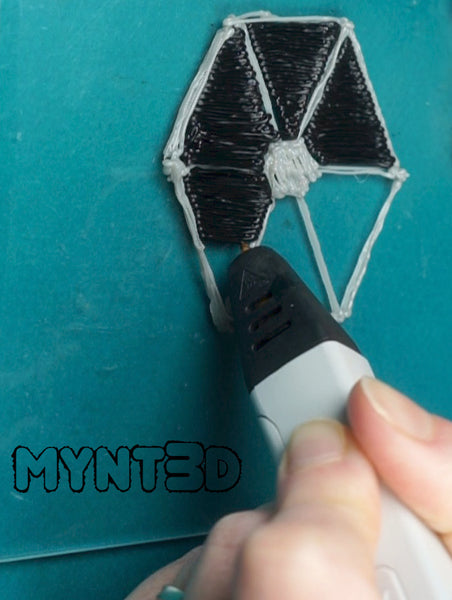
1. Trace the outline of the wings with grey filament; fill in with black filament.
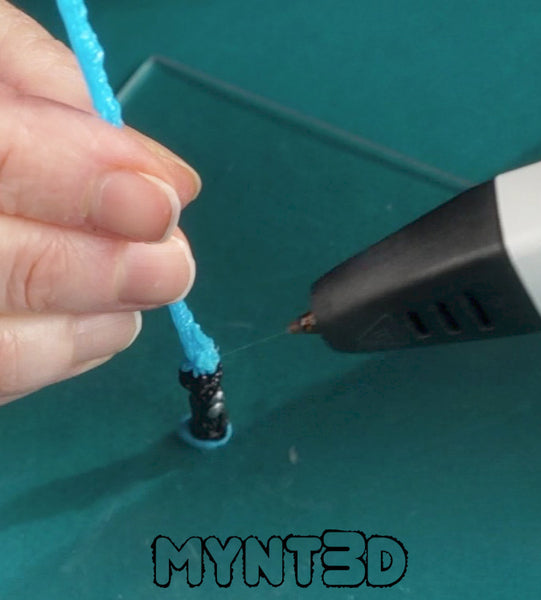
2. Use a pinch of sticky tack to attach to a marble - so you can hold onto it. Wind filament around half of the marble. TIP: It's easier to wind around the area where the sticky tack is, then move the sticky tack to the other side, fill in the hole. Repeat with a second half.
3. Connect the 2 halves with the 3D pen.
4. Position the ball about 1" above the center of one of the wings. Draw to connect the two pieces.
6. Add the geometric detailing of the tie fighter's front window.
7. Dab 2 red dots, equal distance apart, below the window detailing.
The Empire is ready to Strike Back!
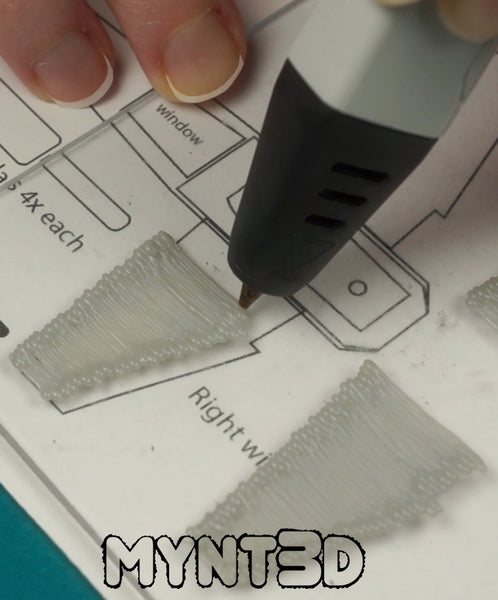
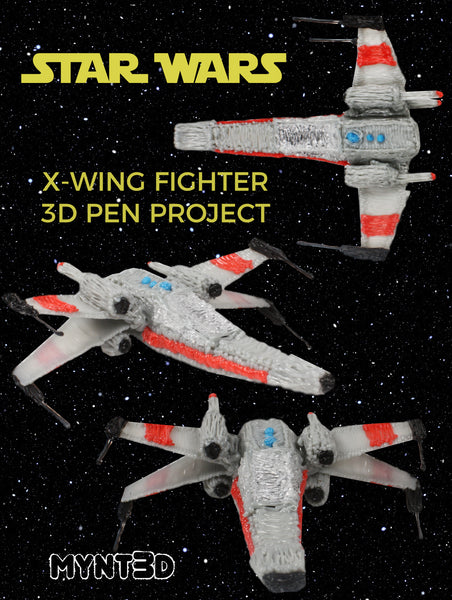
1. Trace over the parts of the X-Wing fighter on the project template with grey filament.
2. For the small cylinders, layer filament back and forth; flip and repeat.
3. For the large cylinders, wind filament around a toothpick. Then fill in by drawing back and forth horizontally. Remove the toothpick.
4. Connect the large and small cylinders so that you have 4 sets. These are the plane engines.
5. Use sticky tack to hold 2 wings in V formation. Attach at the seam using the 3D pen. Repeat with other 2 wings.
6. Attach an engine on the outer wing area, near the seam, above and below on each wing set.
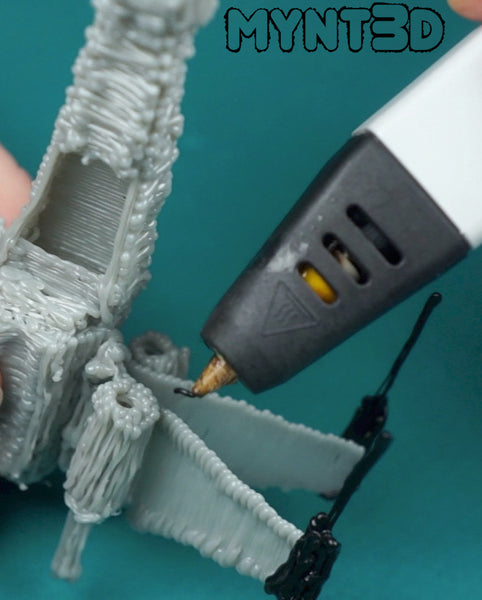
7. Use a small ball of sticky tack to position the middle body layer above the bottom body piece. Connect with the 3D pen. TIP: Be sure to remove the sticky tack before completely drawing around it.
8. Repeat. above technique when adding the top (smallest) body layer.
9. Draw an angled line from the edge of the top layer to the tip of the bottom layer on each side. Fill in the long triangular sides of the plane.
10. Fill in the top, leaving the window area open.
11. Add an extra layer or two of filament around the nose cone area of the front tip of the vessel.
12. Attach each wing set on either side of the fighter jet body, creating the X formation.
13. Draw the 4 wing guns in black filament and attach to the ends of each wing.
14. Fill in the front engine holes and window area with black filament.
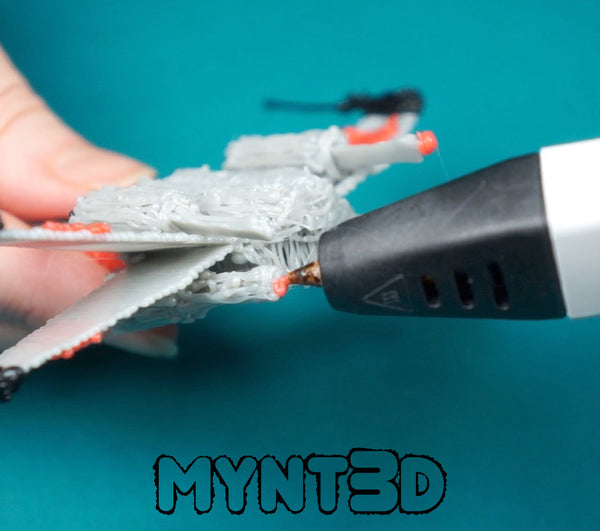
15. Switch to the fluorescent red filament to add detailing to the sides and wings of the fighter plane. Dab a dot on the back of the engine jets.
16. With sky blue filament circle on R2D2's head and a couple accent dots to the top of the vessel.
17. Finally, draw on the window frame in grey or black, and fill in with transparent filament.
Comments will be approved before showing up.

Diane McGrath
April 10, 2018
Ships and figures are amazingly accurate. Directions are precise. Looks like fun project for adults and kids together on a rainy day or school holiday. Looking forward to more👏