Your Cart is Empty
Free shipping on orders over $50 - continental US

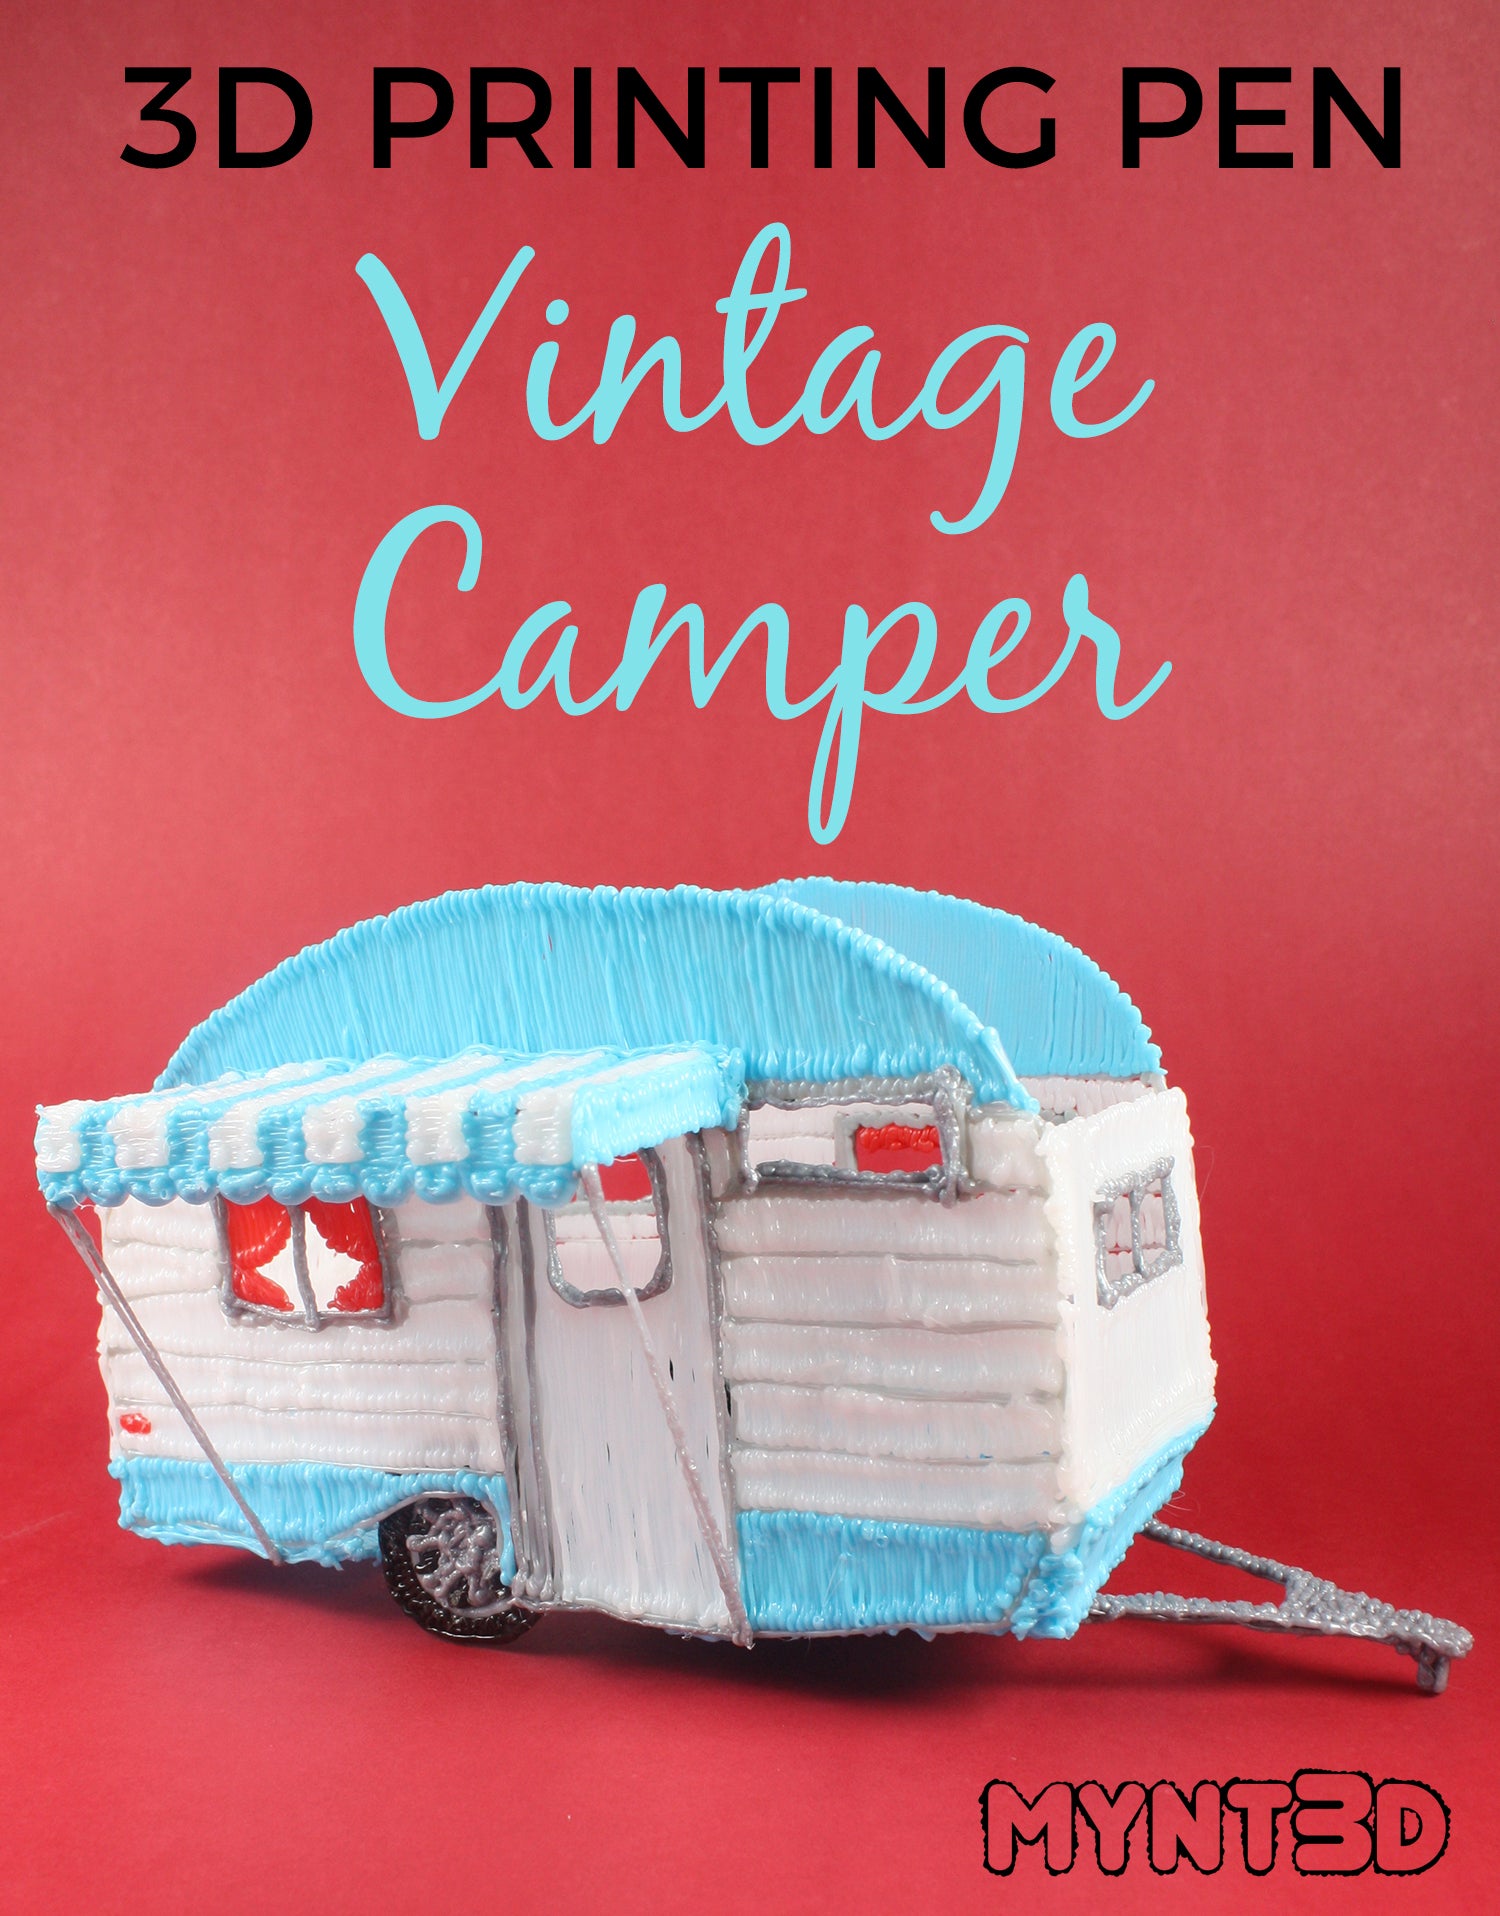
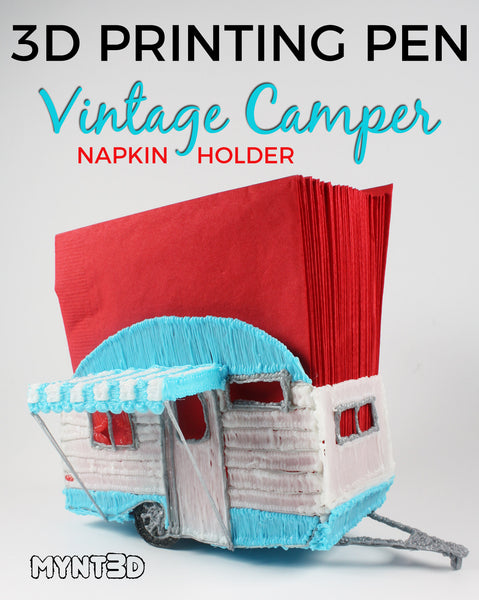
Mynters, do you love camping…or glamping? If so we have an adventurous project perfect for summer décor!
Lately there has been a resurgence of interest in restoring vintage Scotty-style campers. This popularity had trickled down to nostalgic arts and crafts so we thought we had to see it in 3D this summer.
The other thing about this project is that you can make it into functional art. Stay tuned (ahem, keep reading) to see what purpose we gave our mini caravan creation!
Supplies:
• Filament color from the Super 32 pack of ABS: Sky Blue, Natural, Silver, Gray, Red and Black
• Scotty Camper free project template
• Narrow box (optional)
1. Heat up your MYNT3D pen to 210C and pick out your favorite ABS colors.
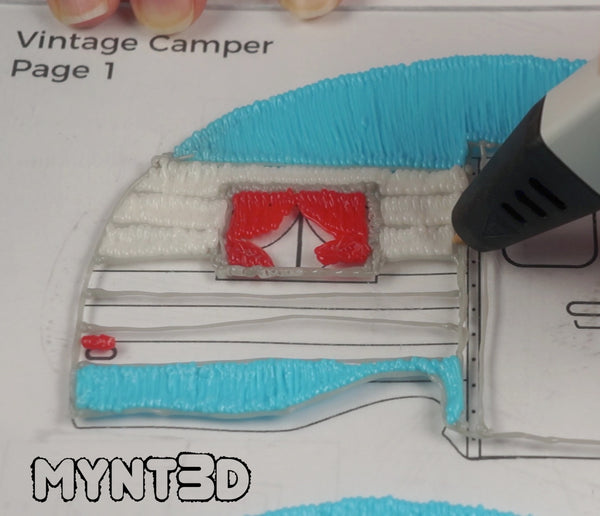
2. Start by tracing the horizontal lines, window frames and door of the retro camper with gray filament.
3. Fill in the top and bottom color sections of the side panels.
4. Next fill in the white sections between the gray lines.
5. Draw the 2 tires using a single white circle, black wheels and silver hubcaps.
6. Attach the wheels to the back-side of the camper side panels.
7. Draw in the curtains.
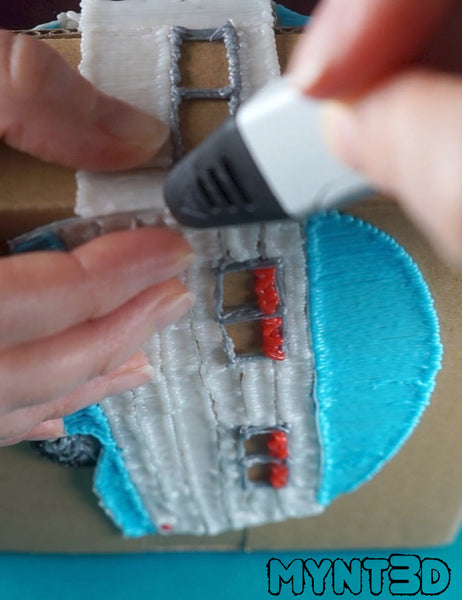
8. Trace and fill in the front section of the camper. Position at the white middle sections of the camper sides, and attach. TIP: It helps to use a box when forming right angles.
9. Use the front piece template as a guide to make smaller sections to fill in the connection between the two sides.
10. Attach the sections and use the 3D pen to fill in the gaps of the curves.
11. For the awning, draw the side-pieces and every other stripe in one color and alternate with another color. Make the scallops in one solid color. Note: If the stripes separate, flip over and connect.
12. Bend the awning front over an edge and connect in the corresponding stripe color. Attach the awning side-pieces.
13. Place the awning over the window and door and attach to the camper. Attach with the 3D pen.
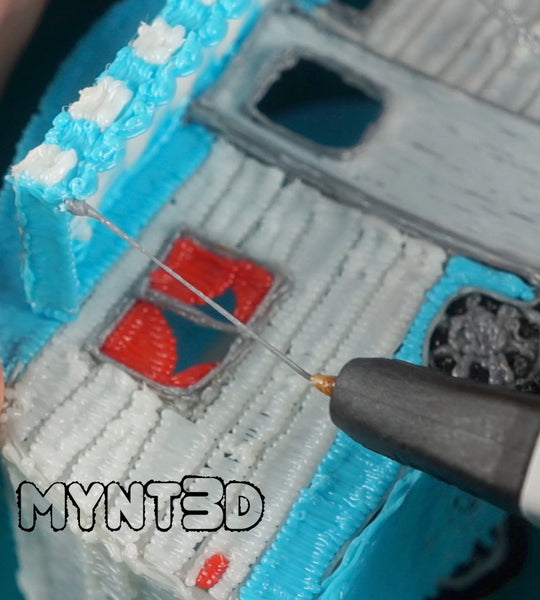
14. Use silver filament to draw the awning supports from each corner down to the camper base.
15. Continue with the silver filament to draw the hitch and attach it to the bottom of the camper.
16. Hold the camper so it’s level, resting on the wheels. Add a dab of filament under the hitch to create the third resting point.
We left the top of the camper open to make it into a napkin holder. This just one functional idea for this adorable mini caravan.
You could also insert electronic tea lights to make it into a luminary. Or place the mini caravan camper in your fairy garden.
Check out other camp themed 3D printing projects from MYNT3D.
Comments will be approved before showing up.
