Your Cart is Empty
Free shipping on orders over $50 - continental US

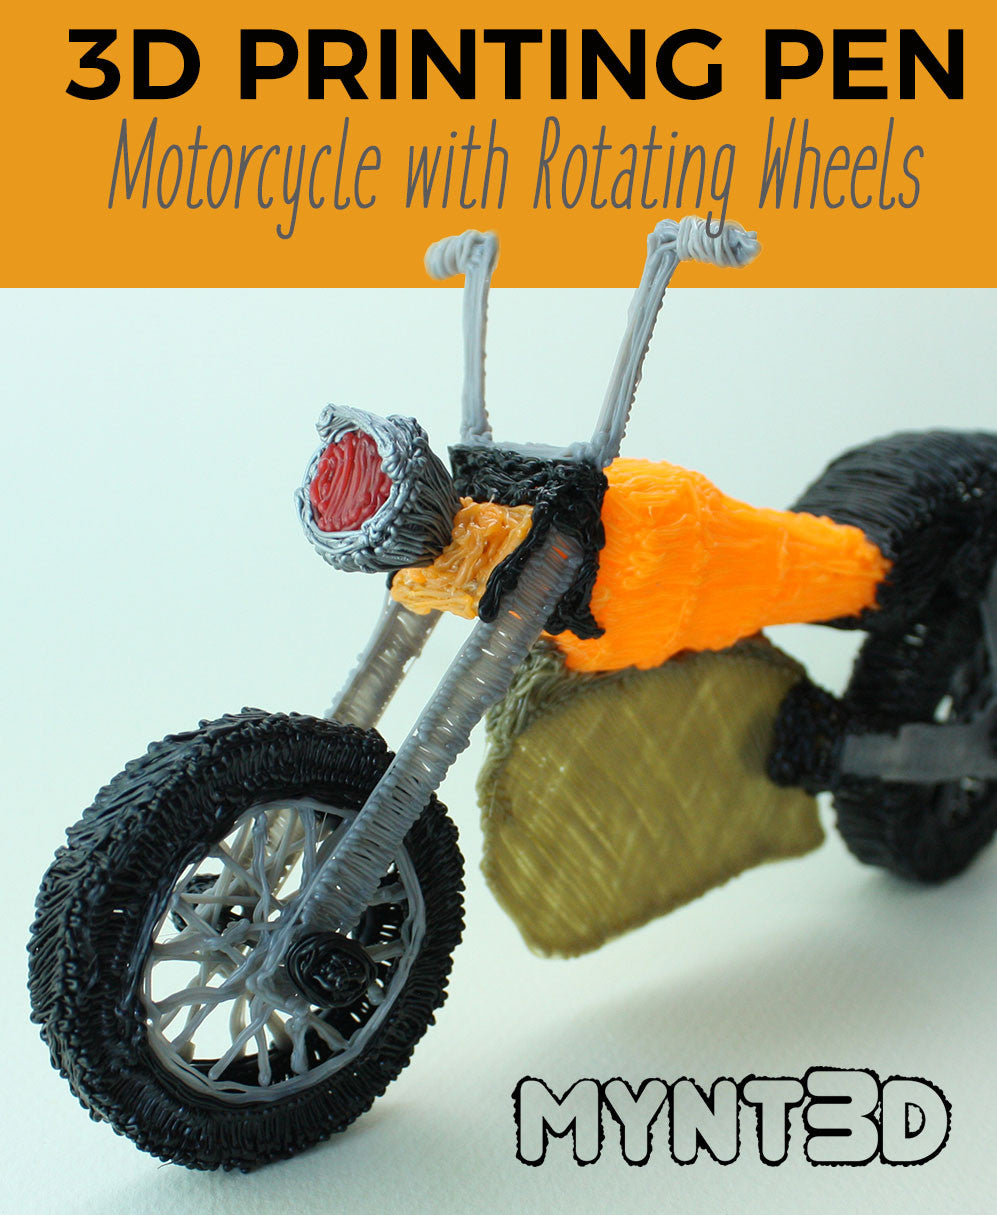
We couldn't resist making this super fun motorcycle with rotating wheels. It can be used for play, as a display model or for teaching about simple machines, ahem, wheel and axel! This project also includes spacial lessons as you assemble the pieces, as well as many techniques to help you get proficient with your MYNT3D printing pen.
Ready to get your motor running...your 3D pen motor that is.

Supplies
MYNT3D professional printing pen
Orange, Black, Gray or Aluminum, Bronze 1.75mm filament
Play Dough Modeling Compound
Clear Tape
Sticky Tack or Rolled-up Masking Tape

1. Start by downloading the Motorcycle Project Template. Use your printer settings to scale template if desired.
2. Start heating your 3D pen. When it reaches the proper temperature, load filament.
3. Trace the stencils for all the 2D pieces, which includes all but the seat, tank and headlight casing.
4. For the seat and tank use the template as a guide to form play dough or modeling clay into its 3D shape. It should be as deep as the width of the front fork connector.
5. Use the play dough form to wind the filament around and cross over itself until you have a grid-like structure, leaving the widest end open so you can remove it from the play dough form.

6. To assemble the wheels, hold two 2D wheels 3/8” - 1/4” apart and connect with the 3D pen, going back and forth from wheel edges as you work your way around the wheel.
6. Repeat with the second wheel.
7. To assemble the front fork, attach the headlight in casing to the center of the fork connector.
8. Position the fork legs so that holes are facing out. Then attach to either side of connector.
9. Insert the front wheel between the fork and thread the axle through the holes.
10. Add another knob onto the other side of axle so that it won't slide out.


11. After creating and connecting the 3D tank and seat, attach the centerpiece underneath. Because the 3D parts will vary in shape and contour (no one’s perfect) use the pen to fill in the gaps.
TIP: Use sticky tack or little balls of masking tape to position the pieces flat on your surface before connecting. This will keep them in place and also elevate them to the proper depth.
12. Position the front fork at an angle and attach to front of tank.
13. Position the back “suspension” pieces on either side of the back wheel lining up the holes so the axle will thread through. There will be a gap where the back suspension overlaps with the centerpiece. Use the 3D pen to connect, giving ample space for the wheel to rotate. Connect top of suspension pieces to the seat.
14. When all is in place, draw end knobs on the wheel axle so it stays in place.
15. Finish by attaching the handlebars on top of where the front fork and tank meet.
Zoom, Zoom!!
Comments will be approved before showing up.
