Your Cart is Empty
Free shipping on orders over $50 - continental US

A 3D printing pen is the only tool that allows you to draw in mid air. You can literally draw lines in any direction and watch them take form within seconds. In most previous projects explored here at MYNT3D, we've used stencil templates and base forms to help construct our 3D sculptures. We've looked at several 3D pen techniques, touching on freehand drawing.
Now we're going to take a deeper dive into the lessons and benefits of free-form, three-dimensional art.
Simple, iconic industrial objects make for perfect starter projects. We suggest a paper base that the filament will easily stick to. And because this process can require both hands, as seen in the photo to the left, you'll want to tack or tape down your base so it doesn't slide around.
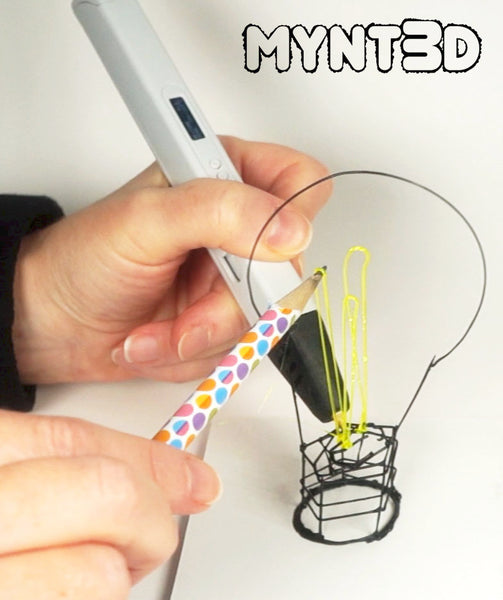
1. Start by drawing a circle - about 1.5" in diameter on your base.
2. Draw several straight, vertical lines extending up from the base circle. Tip: the more vertical lines you draw, the more cylindrical the bottom of the light bulb will be.
3. Wind filament around the vertical structure in a spiraling motion. Then spiral in the top like a spider web. The top will form a platform from which to draw the "carbon filament" part.
4. Next, draw the glass enclosure part of the bulb. This will be represented with a single outline of the shape for simplicity purposes. Start by extending lines from each side of the bulb base.
5. Draw the dome to connect the two straight sides. This is almost impossible to do without assistance. We used a cylindrical glass, held in place, then remove.
6. Finally, switch to a bright filament to draw the inner coils. Start at the web platform drawn in step 3. Draw upward and around a pencil tip, continuing back down. Repeat for several coils.
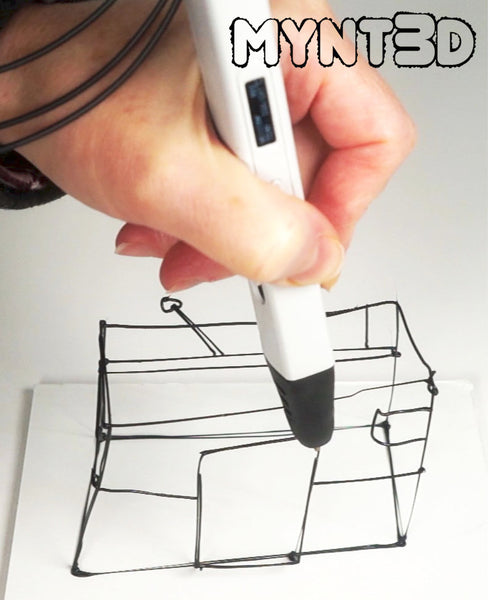
Take the 3D cube to new heights by adding the details of a vintage camera. This will challenge the strength of your structure, requiring balance and support.
1. Start by drawing a rectangular base, outlining a couple times around to secure it to your paper.
2. Draw a straight, vertical line at each corner. Then draw lines to connect them at the top, forming a basic 3d rectangle.
3. Whether you're working from a real life camera, or a photo, simplify the lines of the design to add details such as the film advancer, view finder, lens, and flash cube.
Printing pens are considered an "additive art form," where filament is added - rather than shaped or removed as in most other forms of 3D sculpture. However scissors can be used as an "eraser" when lines need to be reduced or removed.
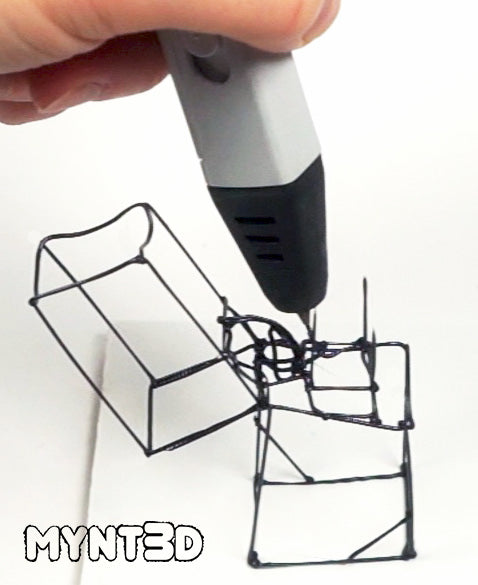
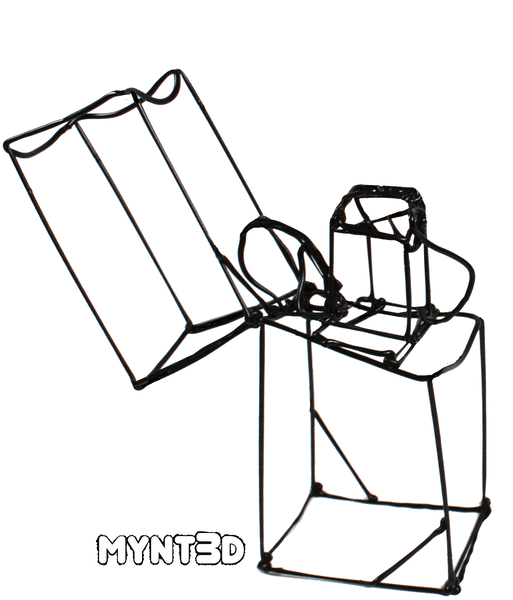
1. Start by drawing a small rectangular base, outlining a couple times around to secure it to your paper.
2. Draw a straight, vertical line at each corner. Then draw lines to connect them at the top. Add angle braces on two or more sides for added stability.
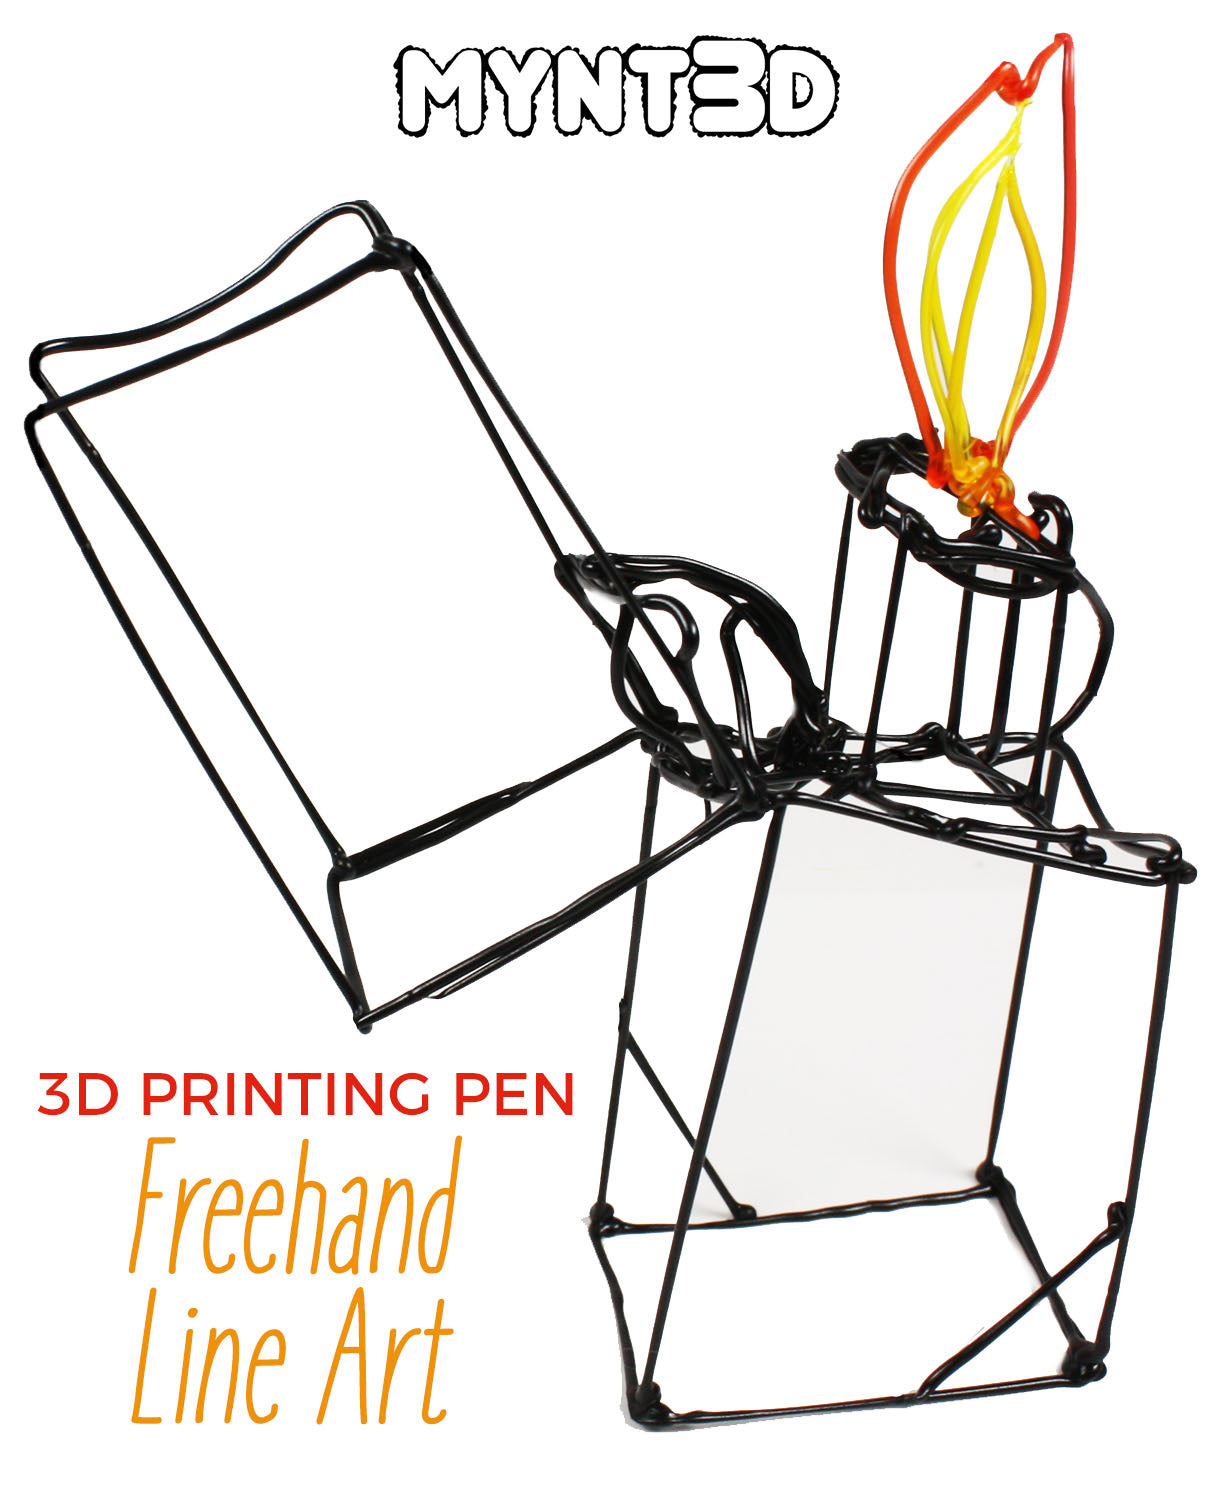
3. Draw lines at an acute angle from one top side of the rectangle. This will become the flipped lid of the Zippo type lighter.
4. Draw a hinge from the body rectangle to the flipped lid.
5. Draw a much smaller cube coming up from the body rectangle. This will form the windscreen. Beside it, add a semi-circle to represent the thumbwheel. Tip: use a pencil to assist with the curve.
6. Switch colors - we used an ombre effect switching between PETG red and yellow, which is translucent filament to draw the flames.
3D Drawing Pen Line Art Flip Lighter from MYNT3D on Vimeo.
Drawing freehand without traditional guides like rulers and vanishing points pose new challenges for artists. These challenges put a twist on the look of the final piece, making it uniquely imperfect. Below we look at some of the lessons and benefits of the new medium of 3D printing pens.
1. Patience - sounds off topic, but holding lines for several seconds while it hardens takes practice and persistence compared to the instant gratification of traditional drawing on paper.
2. Spacial Reasoning - working in 3D challenges artist to look at work from all view points and determine size and proportion.
3. Balance - it may seem obvious, but a 2D drawing has never fallen off the paper, but 3D art certainly can tip over. Therefore symmetry of composition must be considered and successfully executed (engineering in art).
4. Motor Skills - all art requires motor skills, but when drawing in mid air and holding lines while they form, this adds an extra layer of needed control.
5. Shape - as demonstrated in the base of the light bulb, more vertical lines are needed to achieve a rounder shape. 3D printing pen art relies on lines to form shape rather than the other way around.
The above lessons can be applied to STEM and STEAM activities in the classroom. Encourage innovation, invention and creativity in students with these hands-on ideas!
Comments will be approved before showing up.